Panorama Ridge Scramble
View Photos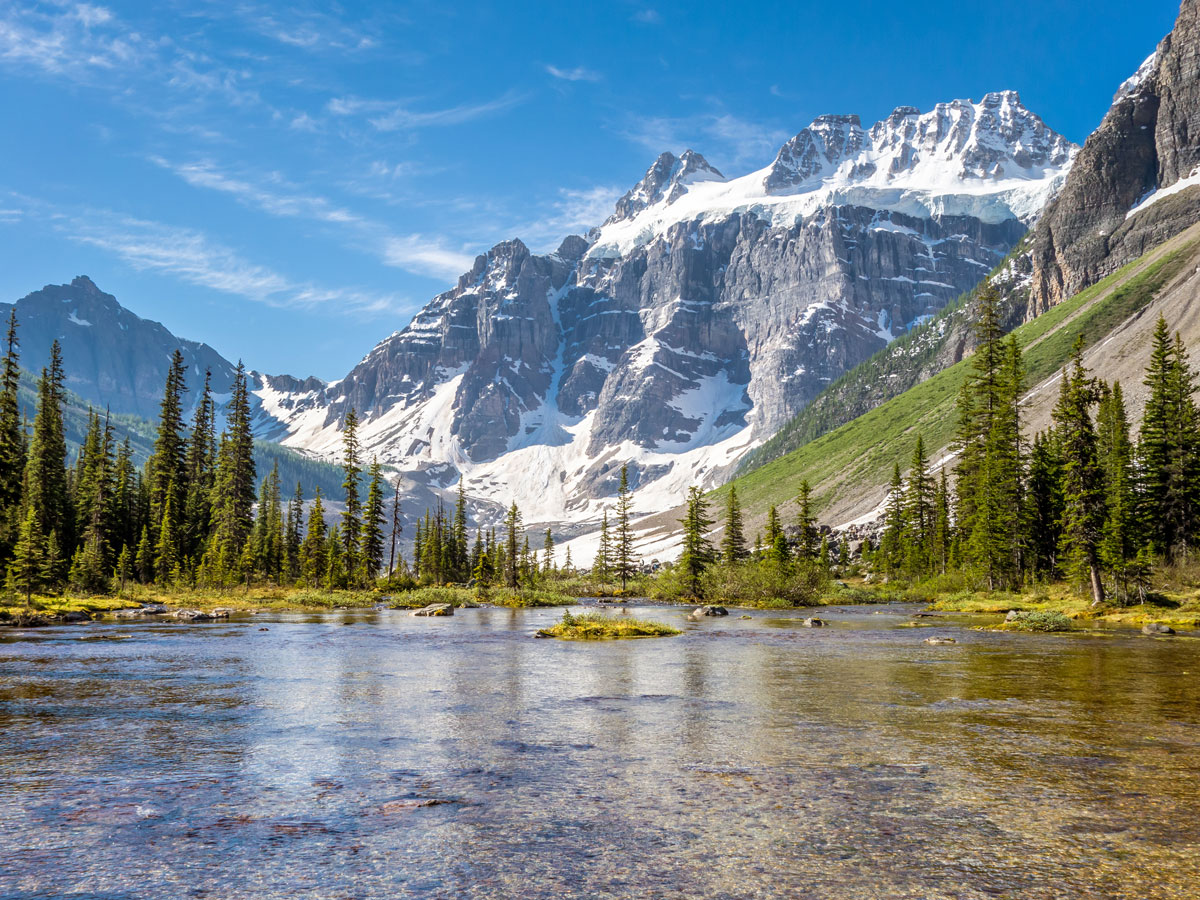
Panorama Ridge Scramble
Difficulty Rating:
The challenging scramble up Panorama Ridge has incredible views combined with a very challenging ascent over moving scree. Some people rate this scramble much higher, however the challenging ascent does hamper an otherwise brilliant scramble.
Getting there
If you want to park at Moraine Lake, your best bet is to get there before 6am. To get there, take Lake Louise Drive from Lake Louise Village for 1.2mi, then turn left on Moraine Lake Road and follow for 7.6mi. Most people end up taking the public transportation.
About
| When to do | July - October |
| Backcountry Campsites | No |
| Toilets | Trailhead |
| Pets allowed | Yes - On Leash |
| Scarmbling Rating | Grade 2 |
| Exposure | Some |
| Family friendly | No |
| Route Signage | Average |
| Crowd Levels | Moderate |
| Route Type | Out and back |
Panorama Ridge
Elevation Graph
Weather
Route Description for Panorama Ridge
The crux of this trip can be just getting to the trailhead. It seems that each year the Moraine Parking Lot fills up early, and once full you aren’t even allowed on the Moraine Lake Road. As of 2018, getting to the parking lot before 6am is one of the only ways to have a good shot at getting a parking spot. There are now private transport options, which you can learn more about from the Parks Canada kiosk in Lake Louise Village. Another option is to ride your bikes the scenic 6.8mi ride to Moraine Lake rather than deal with the bus system.
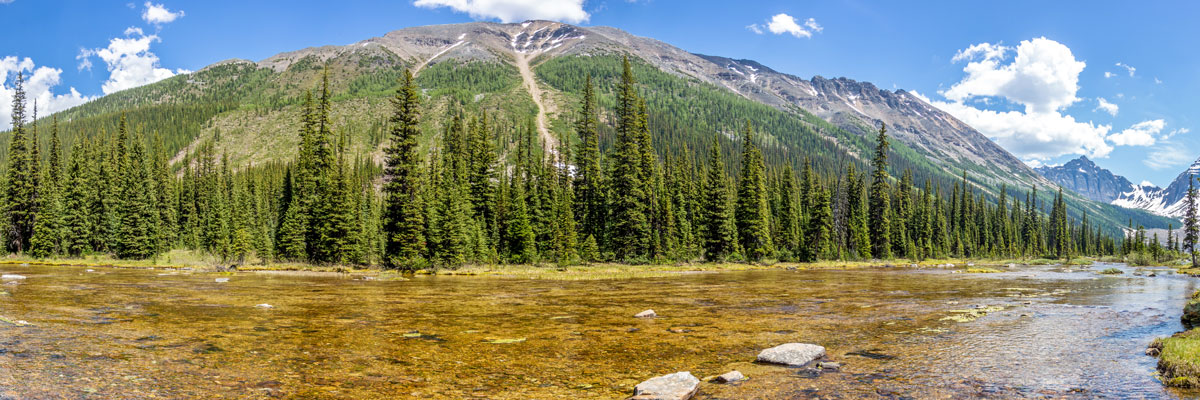
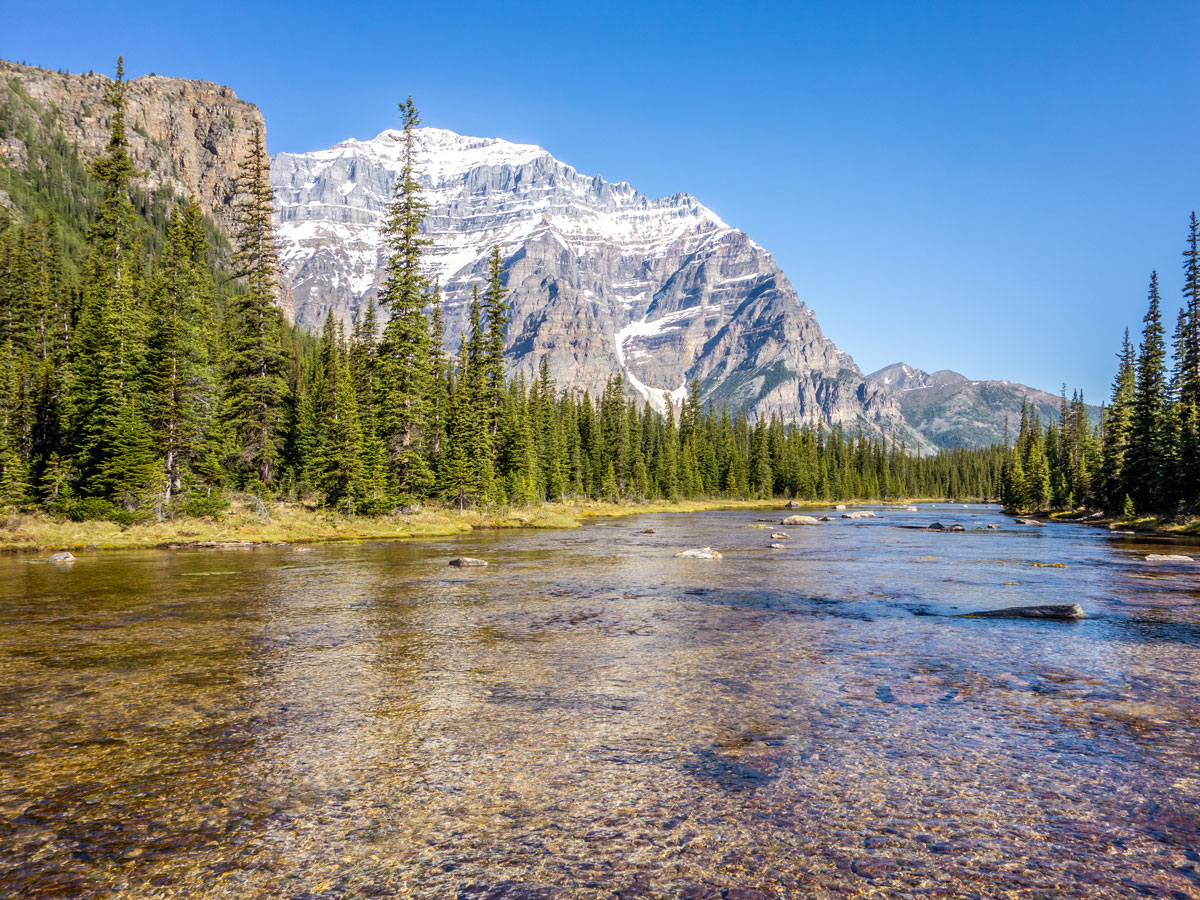
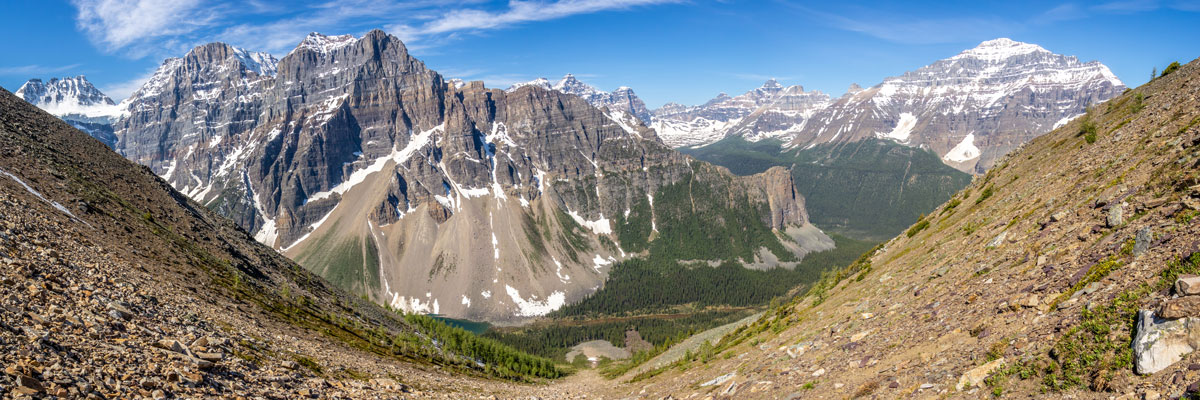
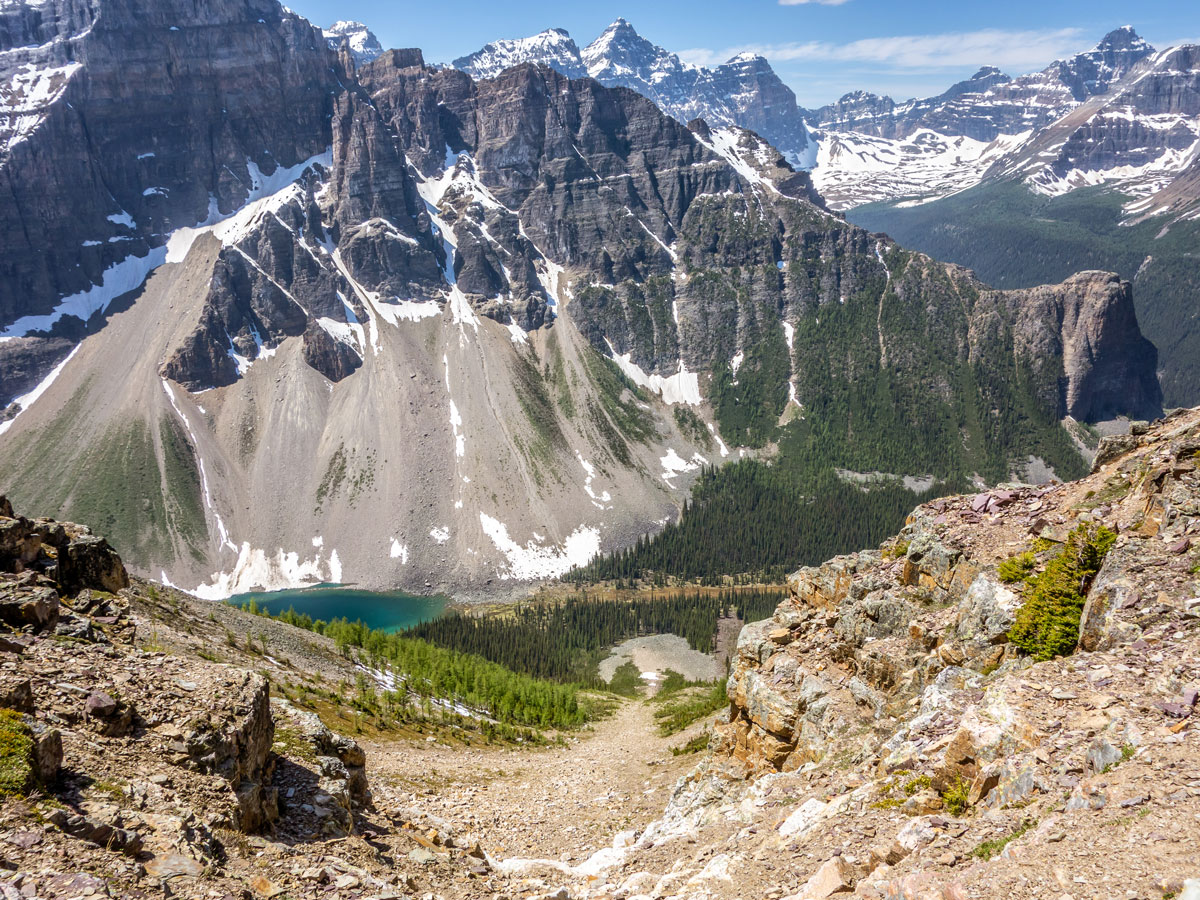
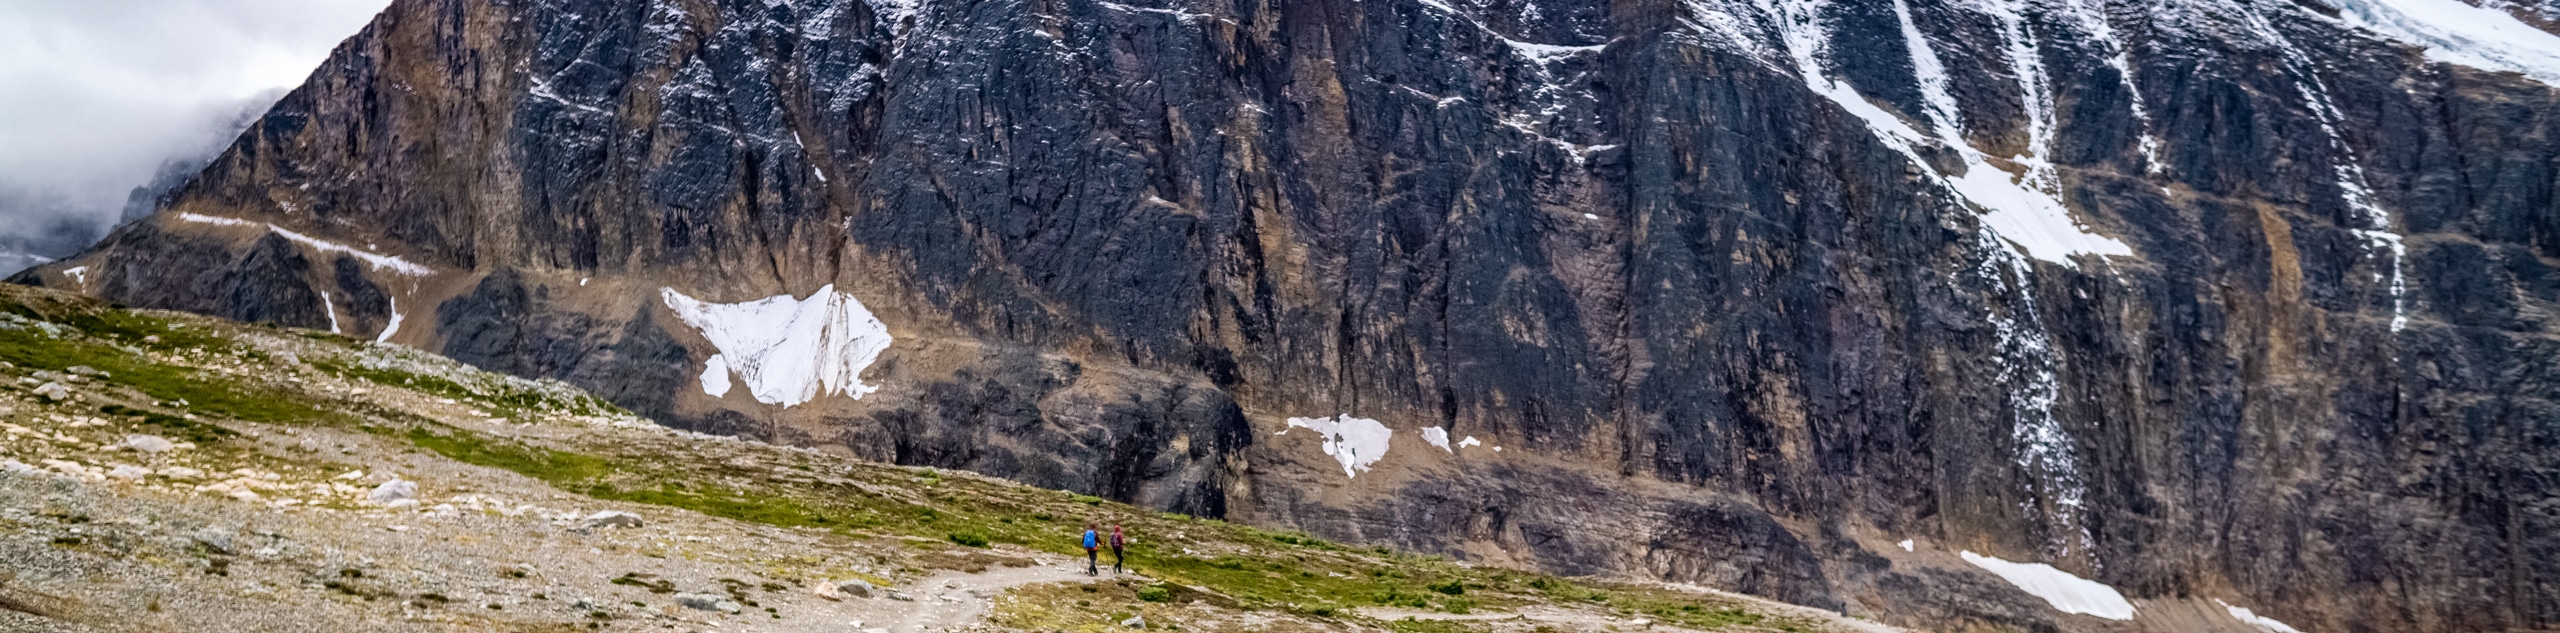
The trailhead is located to the right of the washroom complex. Although initially busy once you turn onto the Consolation Lakes fork the crowds mostly disappear. The trail is quite pleasant and shared only with people out for an easy morning hike to the pretty Consolation Lakes.
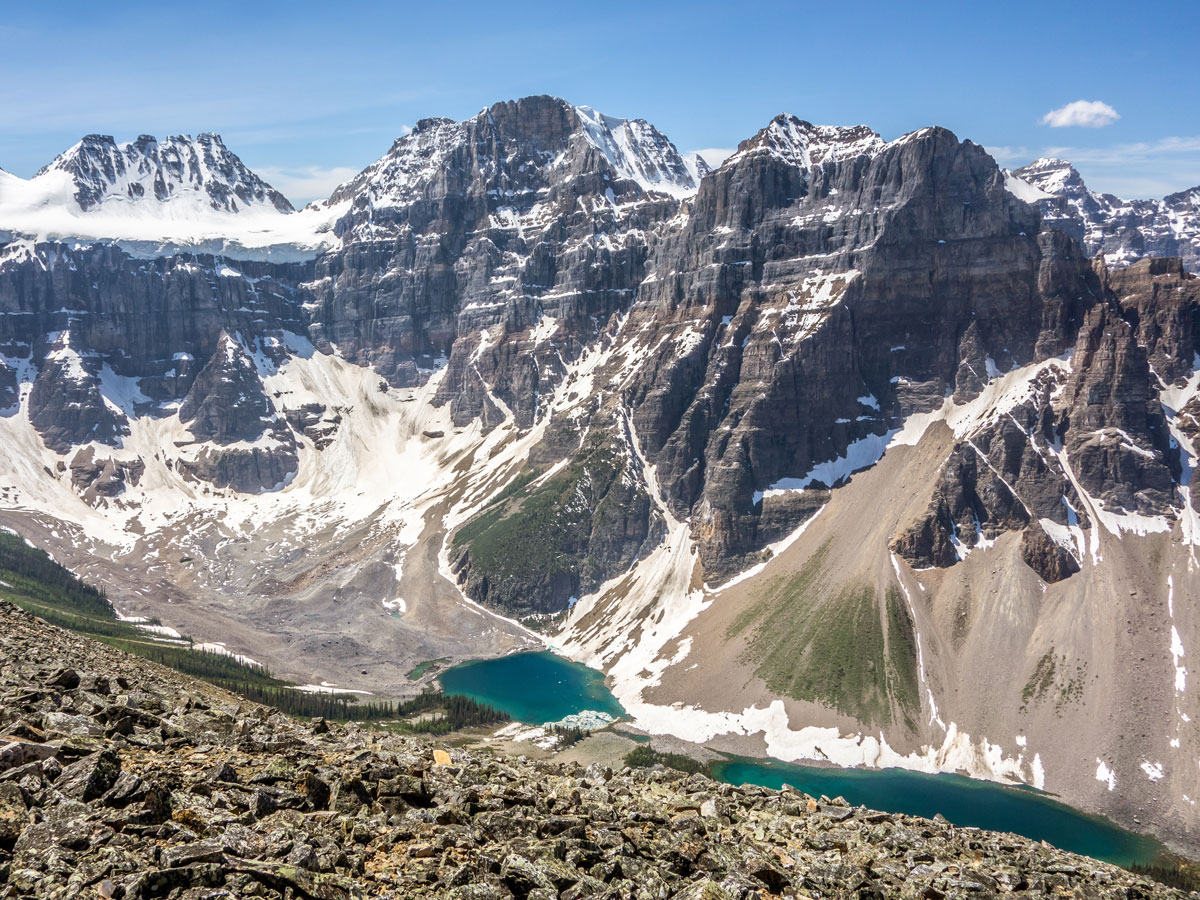
The standard route has you hike to the shoreline of Consolation Lakes and cross Babel Creek there. However shortly before the lake, the stream can get extremely shallow and so can be crossed here instead.
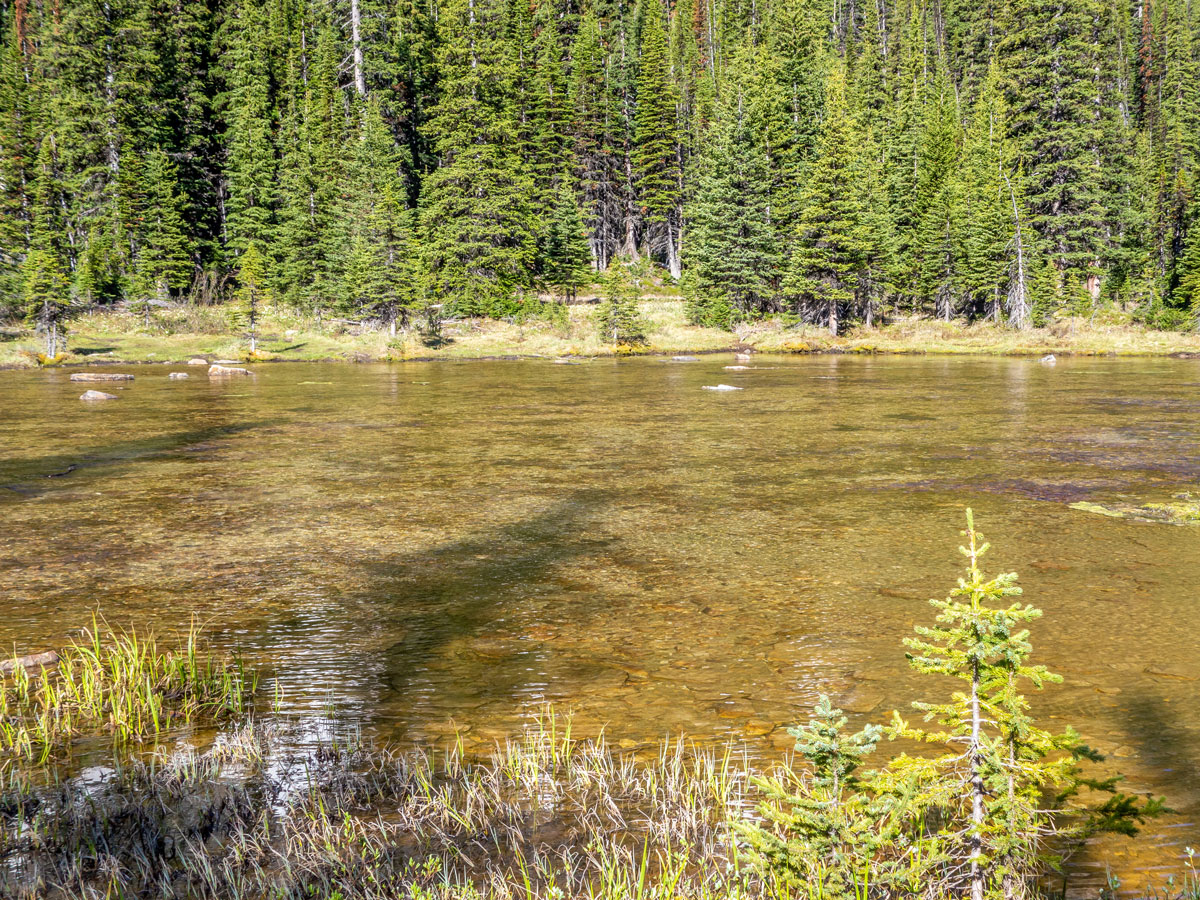
Once across the stream, head straight (east) on the path into the open forest before bashing through fresh avalanche debris and eventually arriving at a quartzite boulder field at the base of the ascent slope.
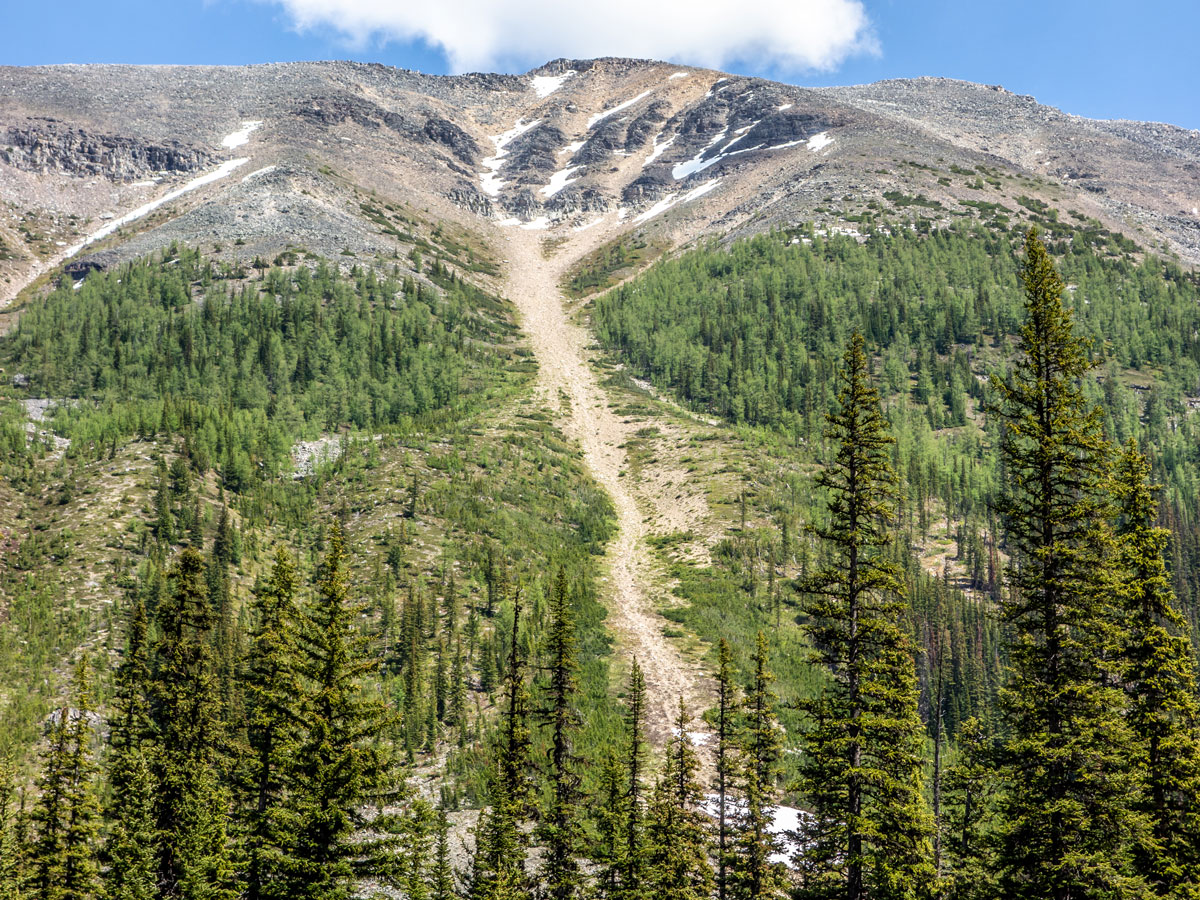
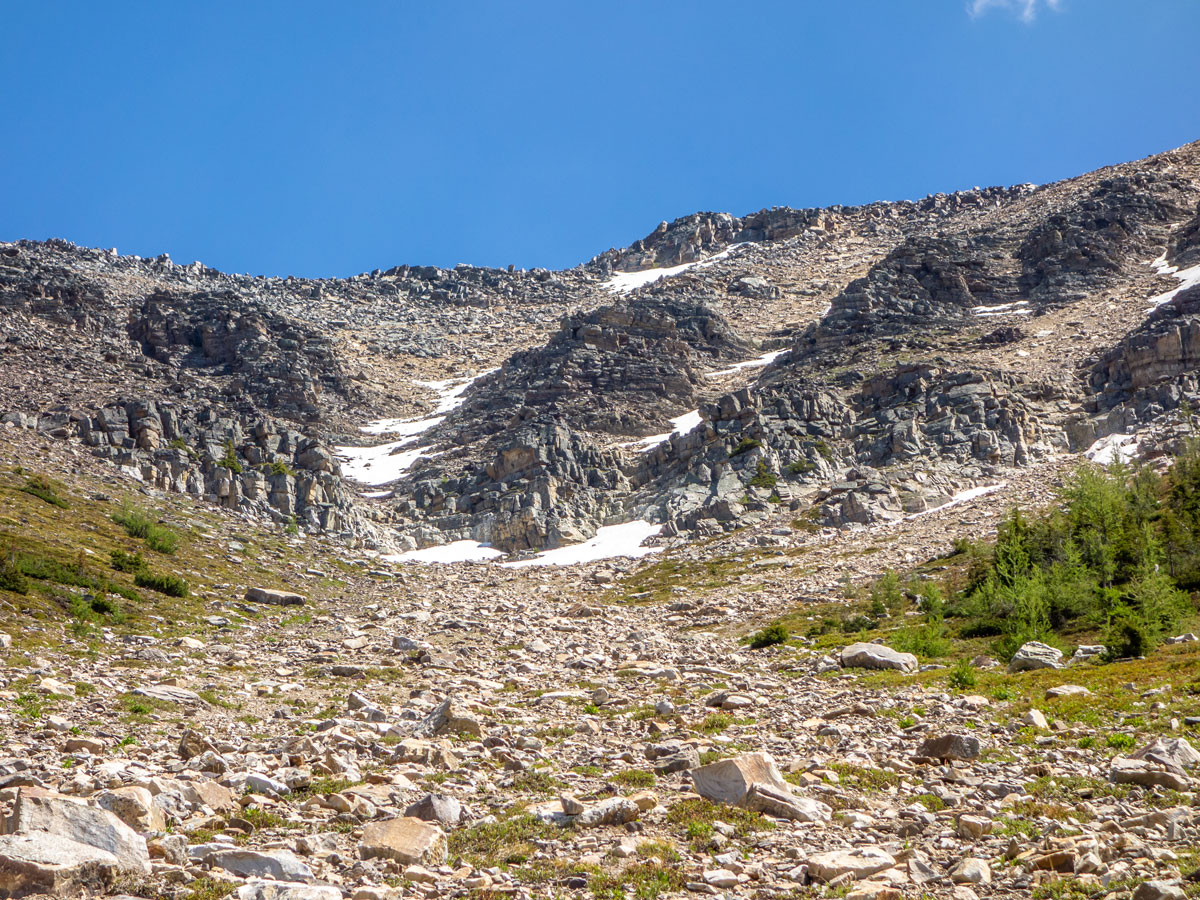
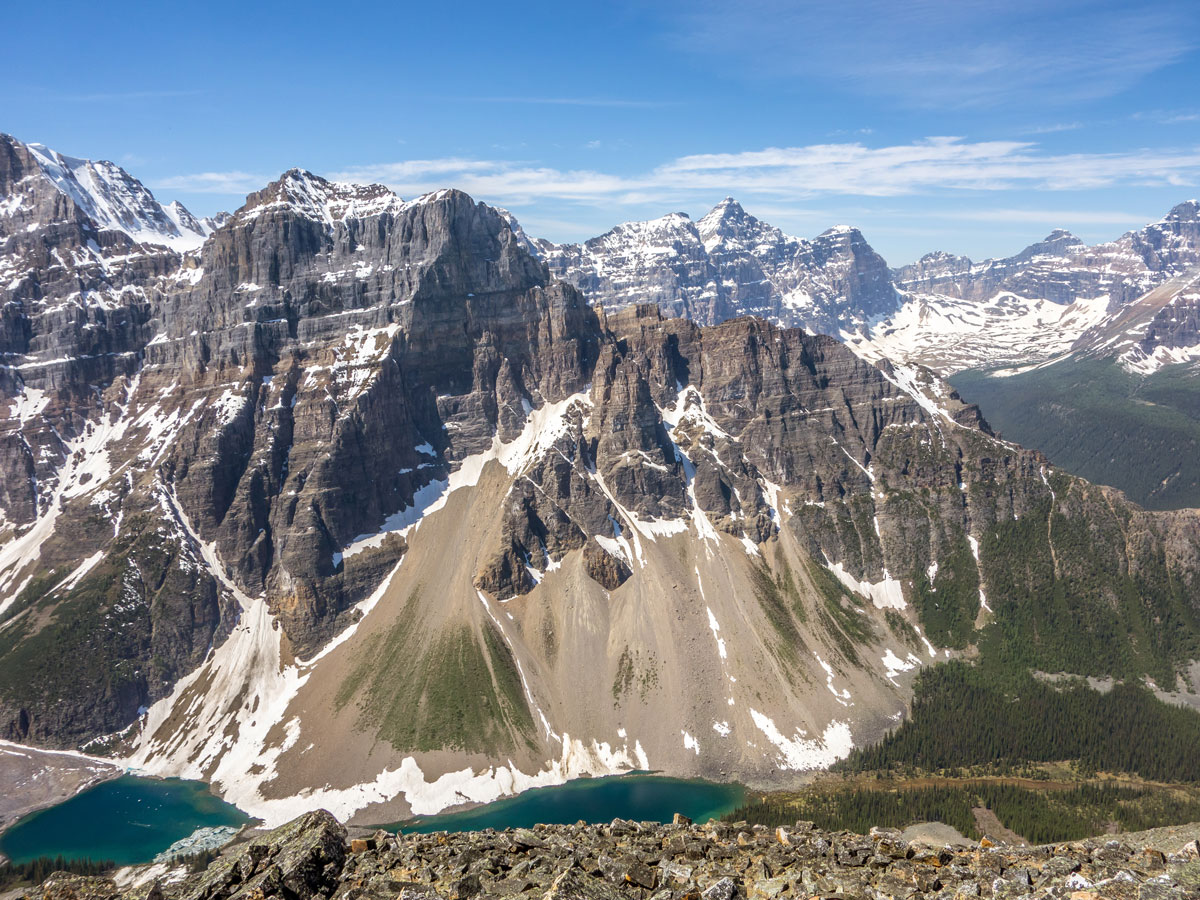
Although the boulder field is a little annoying to cross, it is otherwise fine. Next, you will take an often-faint trail, and grind up the steep slope on relatively stable scree and dirt. As you gain elevation it is recommended to move to the right onto the vegetation, which is easier to hike on. As you approach the crumbled cliff band, it’s best to trend back to the center of the drainage.
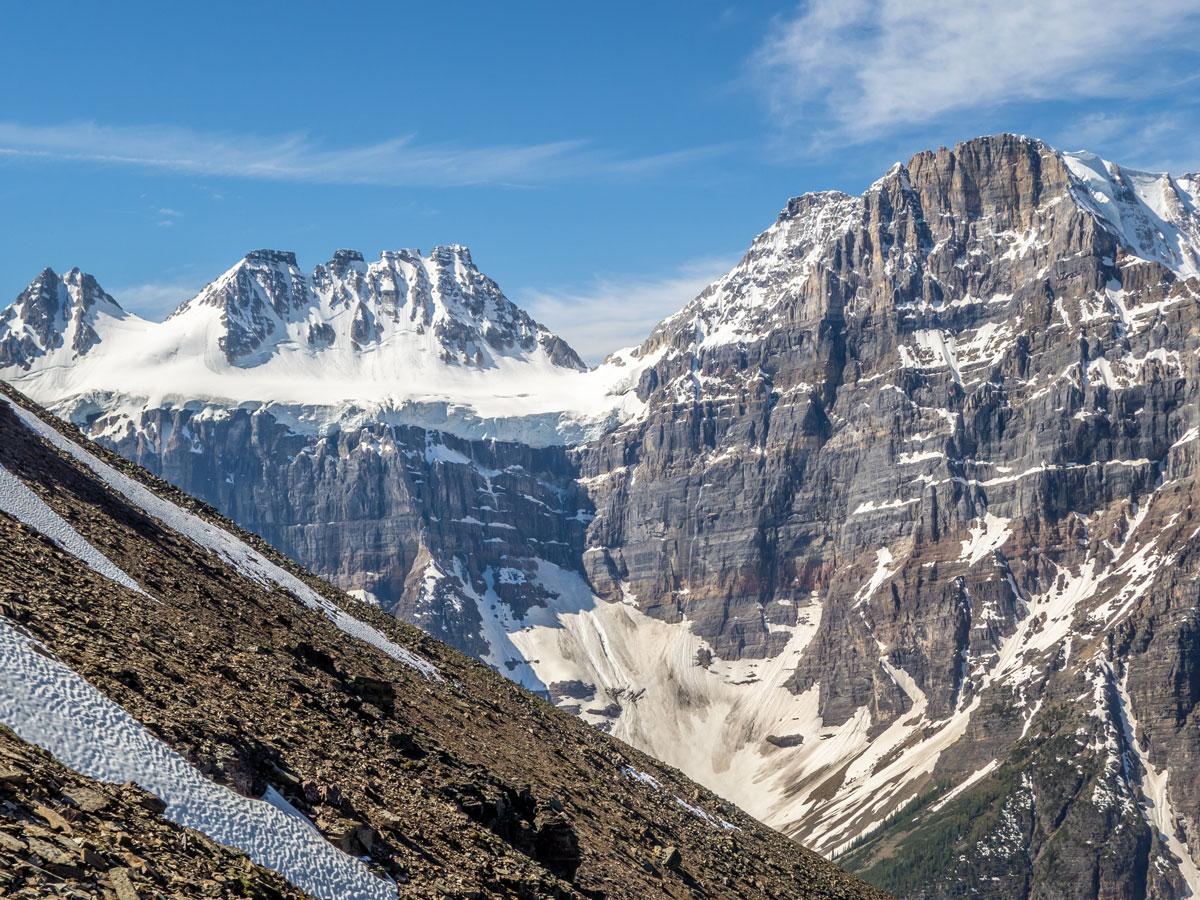
You will see in front of you lovely blocky steps in the waterworn gully that look ripe for climbing. This was easy to begin with, but as they disappeared the terrain was replaced with extremely hazardous rubble and scree. It is extremely loose and also quite large. It shouldn’t be lost on you that there’s a big difference between slipping on little rocks and starting a cascade of 50-pound boulders raining down.
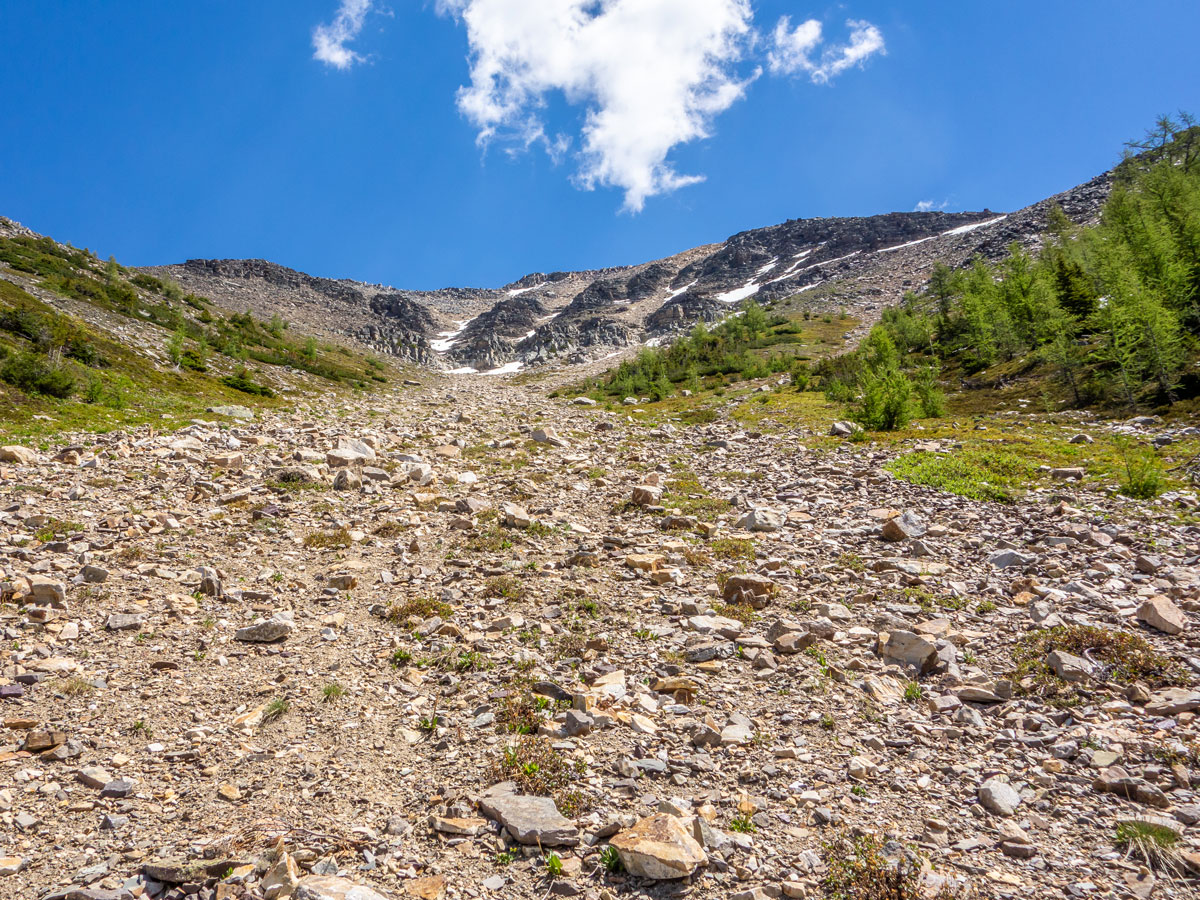
It is a struggle to ascend this mess, and you will find yourself zigzagging from side to side looking for something tolerable. Unfortunately, things will get progressively worse. Fifty-pound rocks are slowly replaced by desk-sized boulders that are just as unstable. You will have to test every step, and even then, every second rock you step on will still shift and dislodge another dozen precariously balanced rocks around it.
Hiking poles are useless as they seem to skip across the smooth rock and so your hands are repeatedly called into action. Very dew summits have this much loose and dangerous terrain.
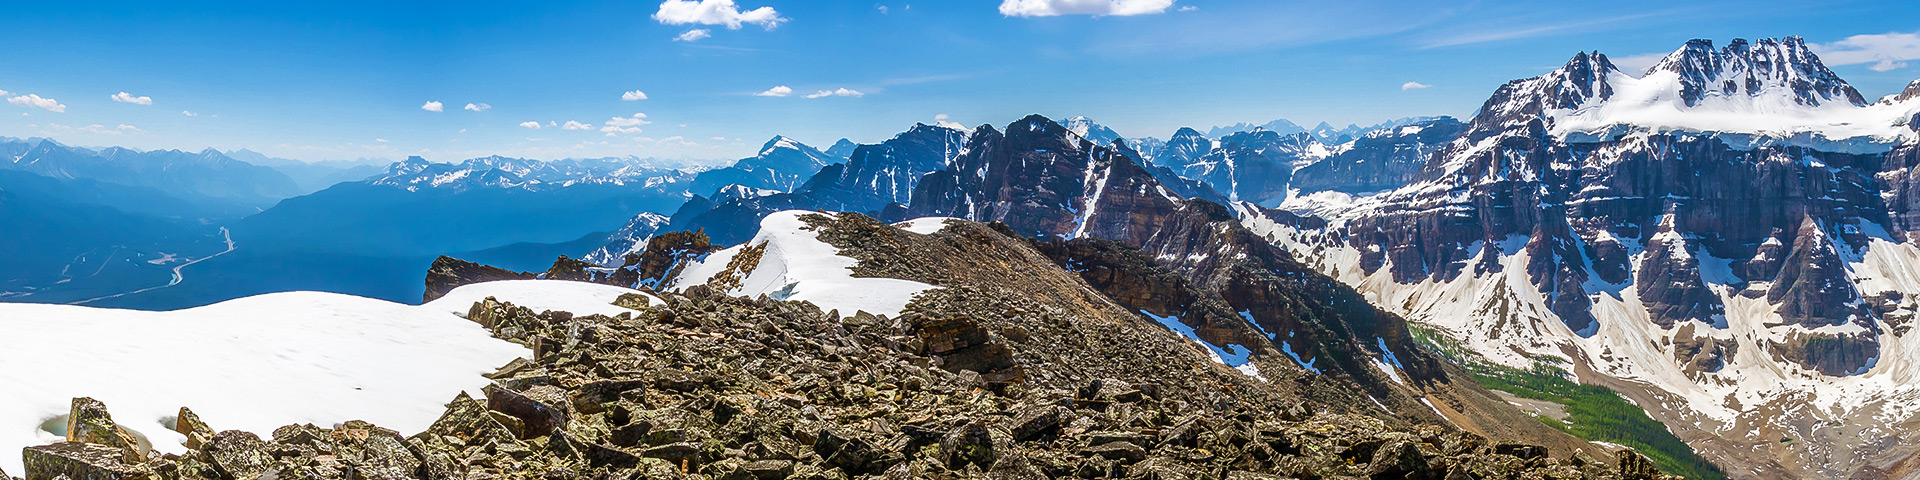
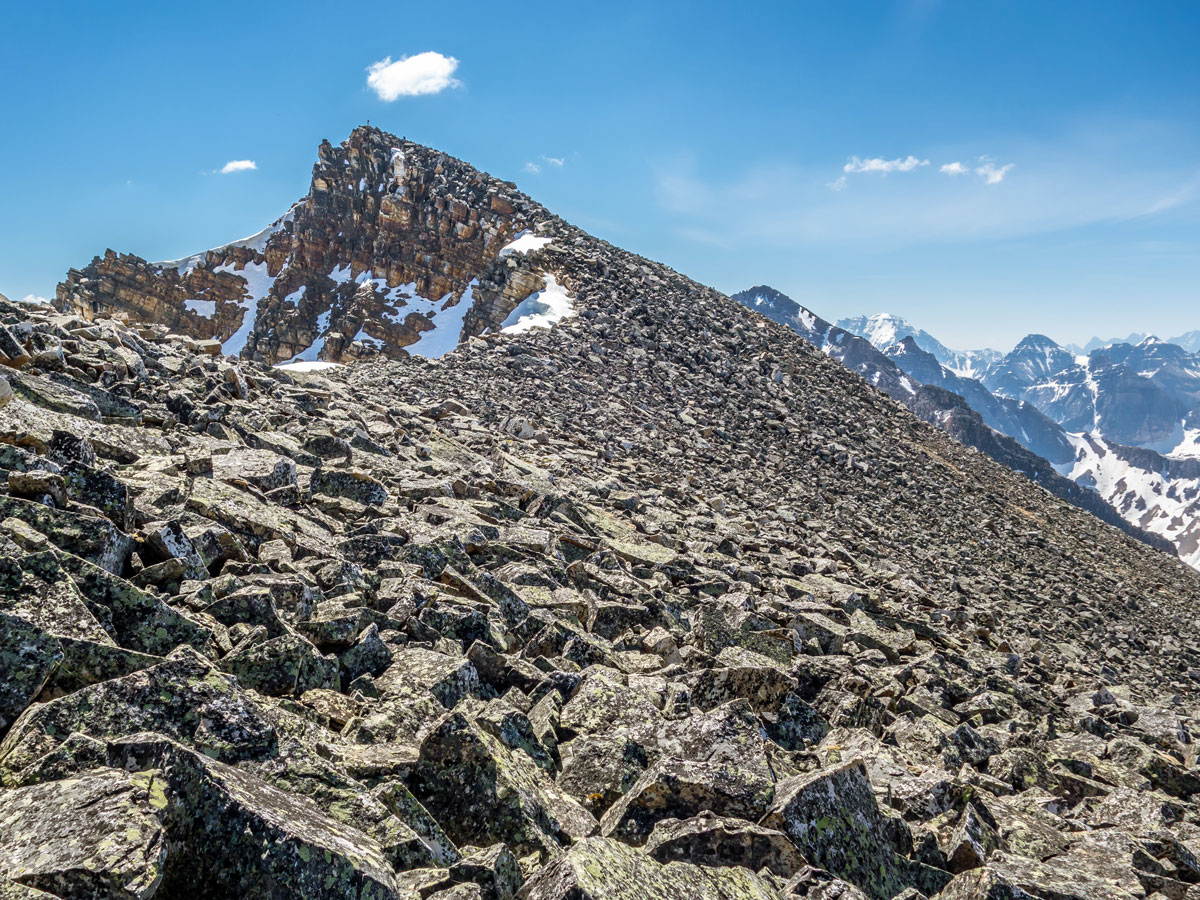
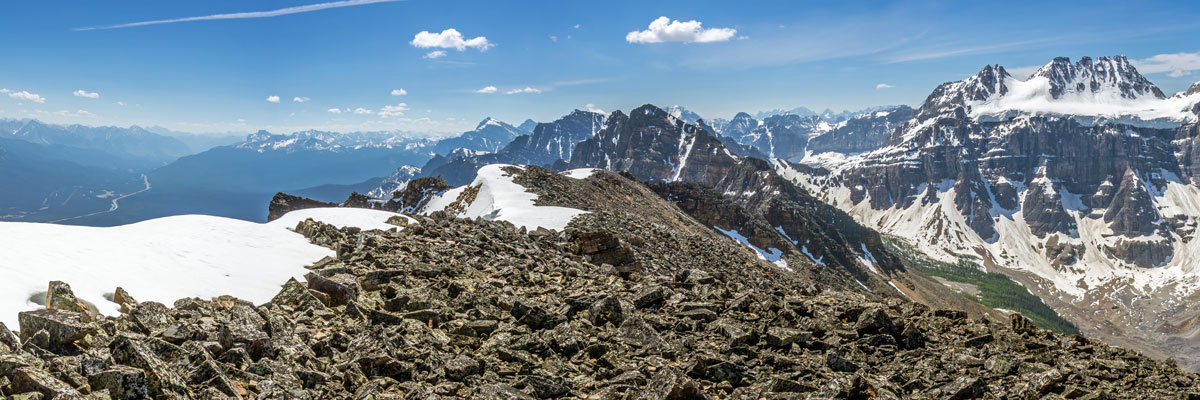
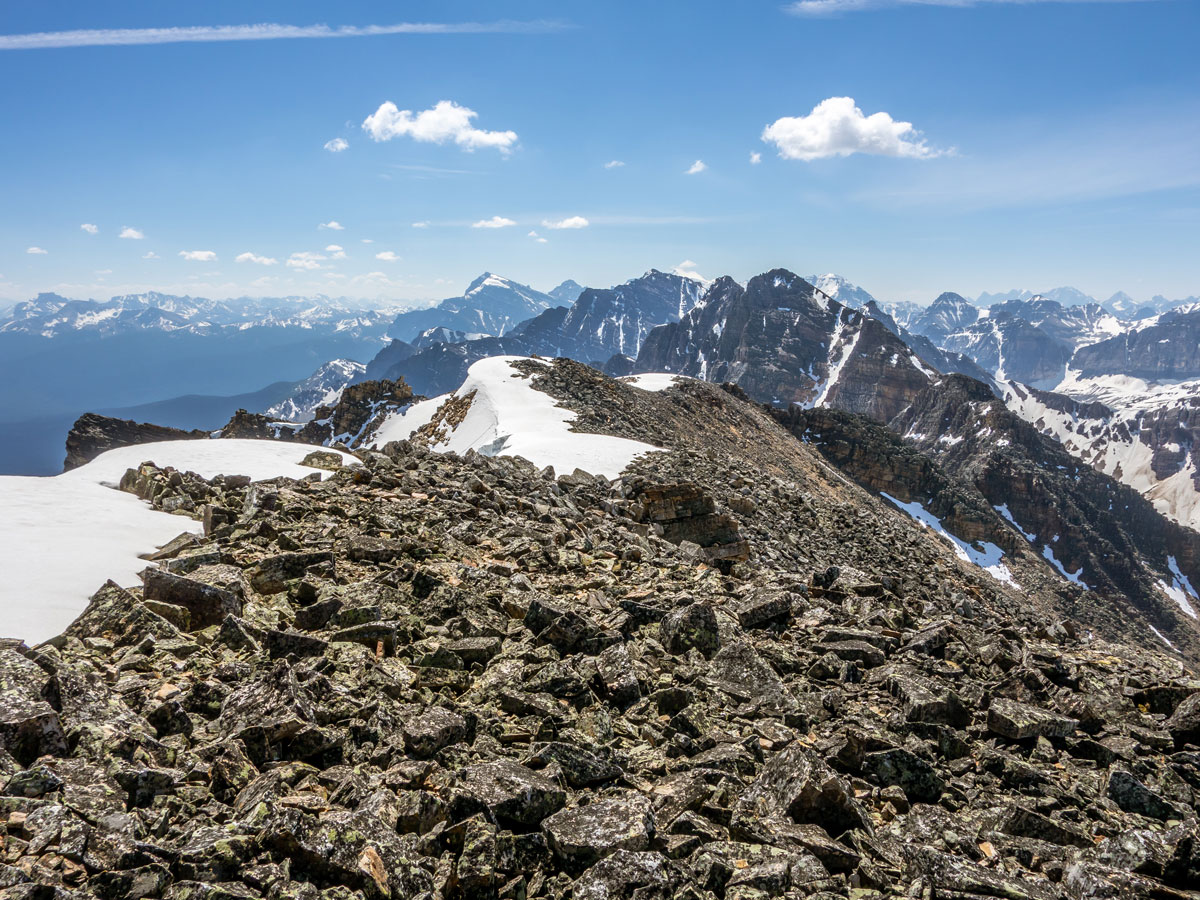
Before you summit, you may have to cut across the slope to a point beyond the cornice. Regaining the ridge afterwards will bring another riot of unstable debris, and while the traverse on quartzite boulders along the ridge to the summit is better, there are still several dozen huge boulders that will unexpectedly rock one way or another.
This was in no way an easy scramble!
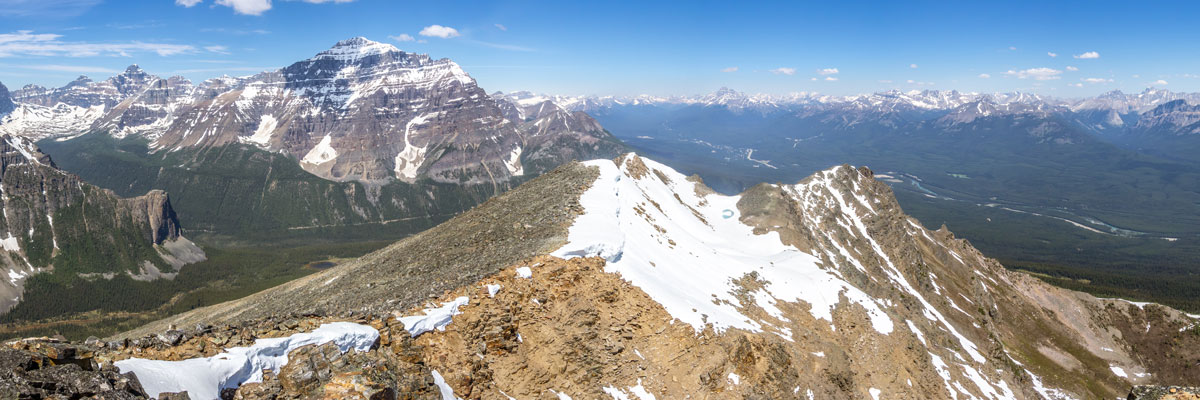
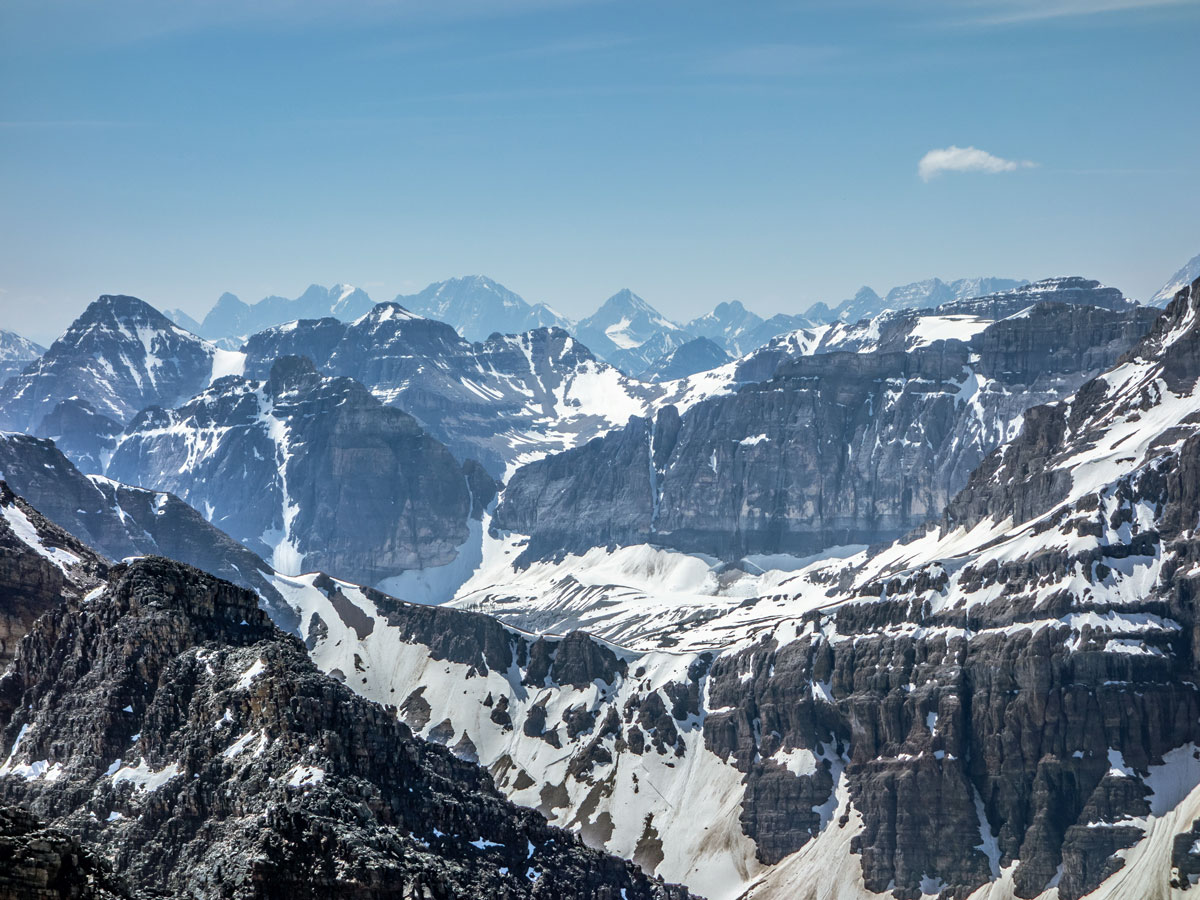
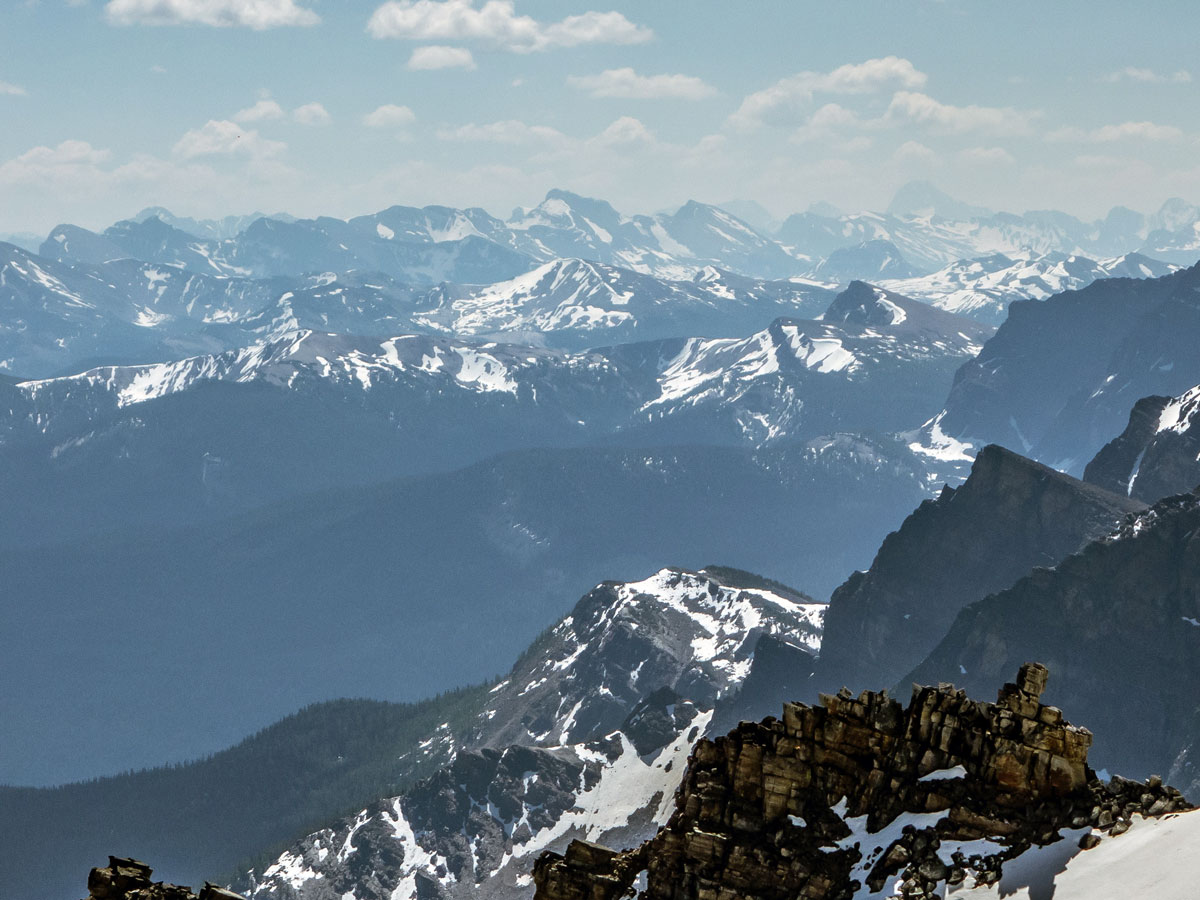
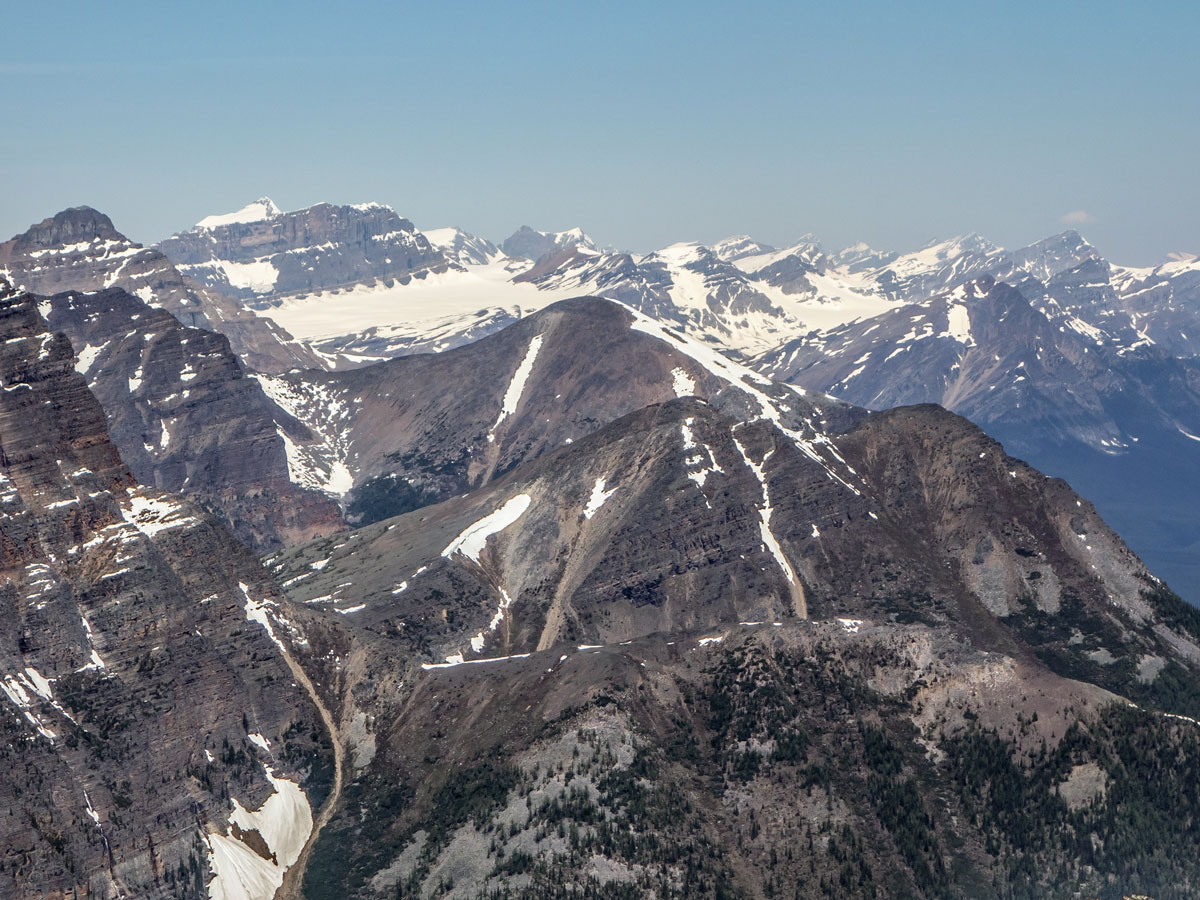
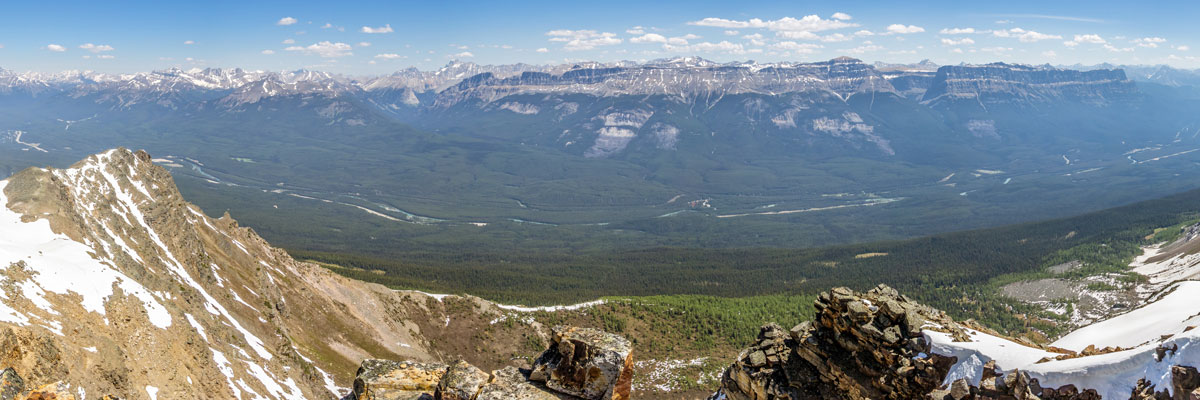
The savior of the day was the spectacular view of the peaks to the west, the most impressive being Quadra Mountain. The views to the east, north, and south were great too.
The way back down is the same as the way up. It’s not ideal. As you make your way slowly down, you will often be surfing on rocks as they give way underneath you. You may decide that to avoid a potentially uncontrolled glissade, a descent using the adjacent snow is preferred. This often works better and can carry you over the worst of the mess. After that the descent was no more difficult than any other. Take a break at Consolation Lakes and take the easy route back to the parking lot.
Insider Hints
It’s much better to park compared to using the bus, however with new regulations cars are not allowed between 6am and 9pm. Get there early or else consider riding your bike. There are private buses that are allowed on the road, and you can get information from Parks Canada at Lake Louise Village.
Moraine Lake Lodge is a wonderful, luxurious mountain lodge. If you have the budget, staying here is a very good option, as you can explore Moraine Lake in the early morning and after dinner, when the crowds are less. The on-site Snowshoe Cafe is a good option for a take-away snack.

Similar Scrambles to the Panorama Ridge Scramble

Eiffel Peak
Eiffel Peak isn’t frequented by many who make their way to Moraine Lake. It is a difficult scramble with less…
Mount Edith
Mount Edith scramble begins with the unsuspecting Cory Pass hike before branching off to the right to begin gaining Mount…
Mount Rundle
Locals stare at Mount Rundle day in and day out, enough to acquire a personal relationship with the impressive feature.…
Johnny T 5 years ago
cool views, nice climb.