Ring of Steall Walk
View Photos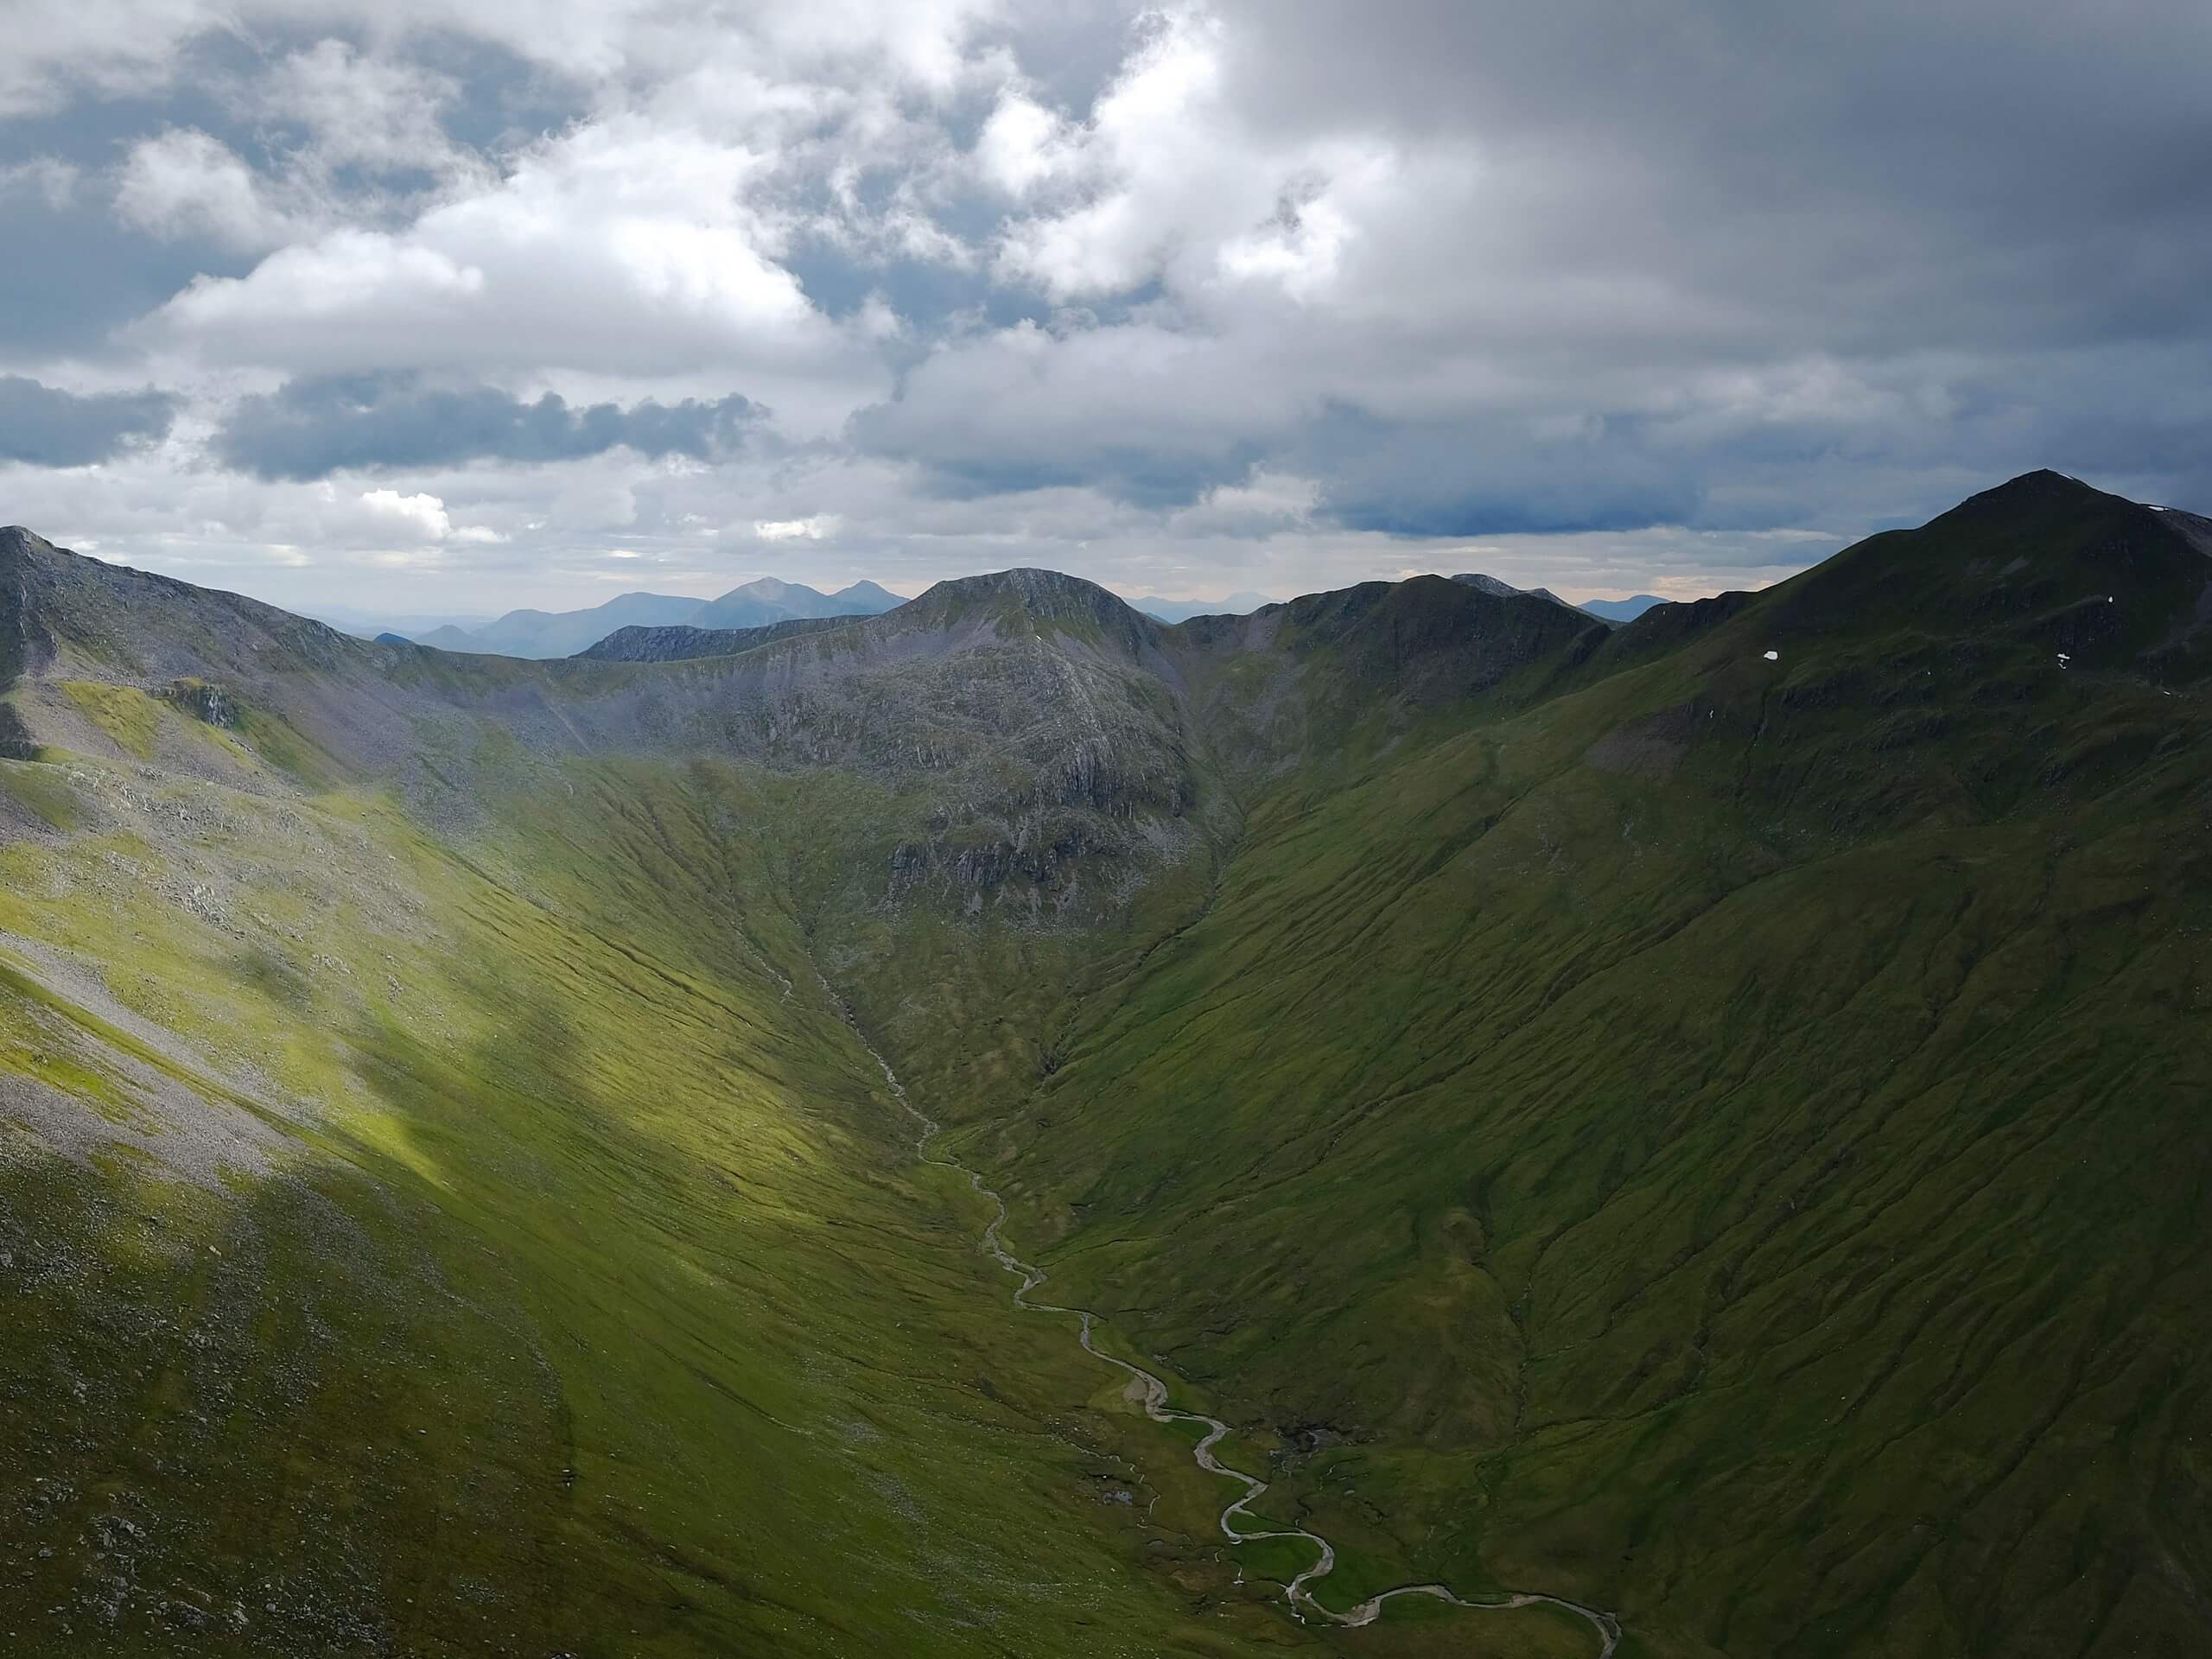
Ring of Steall Walk
Difficulty Rating:
Completing the circular Ring of Steall Walk is no easy feat! Expect to tackle not one, but four Munros— An Gearanach, Stob Choire a Chàirn, Devils Ridge to Sgùrr a'Mhaim, and Am Bodach—while traversing incredibly rugged scenery! From phenomenal glen views where the Steall Falls elevate the level of wonder from 10 to 10+ to dumbfounding views atop four different peaks, the Ring of Steall Walk exhausts and entertains!
Getting there
The Ring of Steall Walk starts at the end of the road up Glen Nevis.

About
| Backcountry Campground | No |
| When to do | May - October |
| Pets allowed | On-Leash-not recommended |
| Family friendly | No |
| Route Signage | Good |
| Crowd Levels | Moderate |
| Route Type | Circuit |
Ring of Steall Walk
Elevation Graph
Weather
Ring of Steall Walk Description
Have some hillwalks under your belt and feel ready to tackle the incredibly exhausting and rewarding Ring of Steall Walk in the Highlands? You’ve come to the right place! Before you go, it’s essential to consider some precautions. Number one: this hike is super strenuous and isn’t for the faint of heart or inexperienced. Bring lots of water and snacks—you’ll need them. Number two: While the route follows a relatively clear path, you will take on some minor scrambles along rough rocks. Expect some exposure as well! Number three: traverse narrow ridgelines. This last point is why we suggest leaving your dog at home. It may be too risky to navigate these sections with a pup by your side. Number four: One missed turn in particular after the 4th Munro can be dangerous. Be sure to bring a GPS to ensure you stay on track!
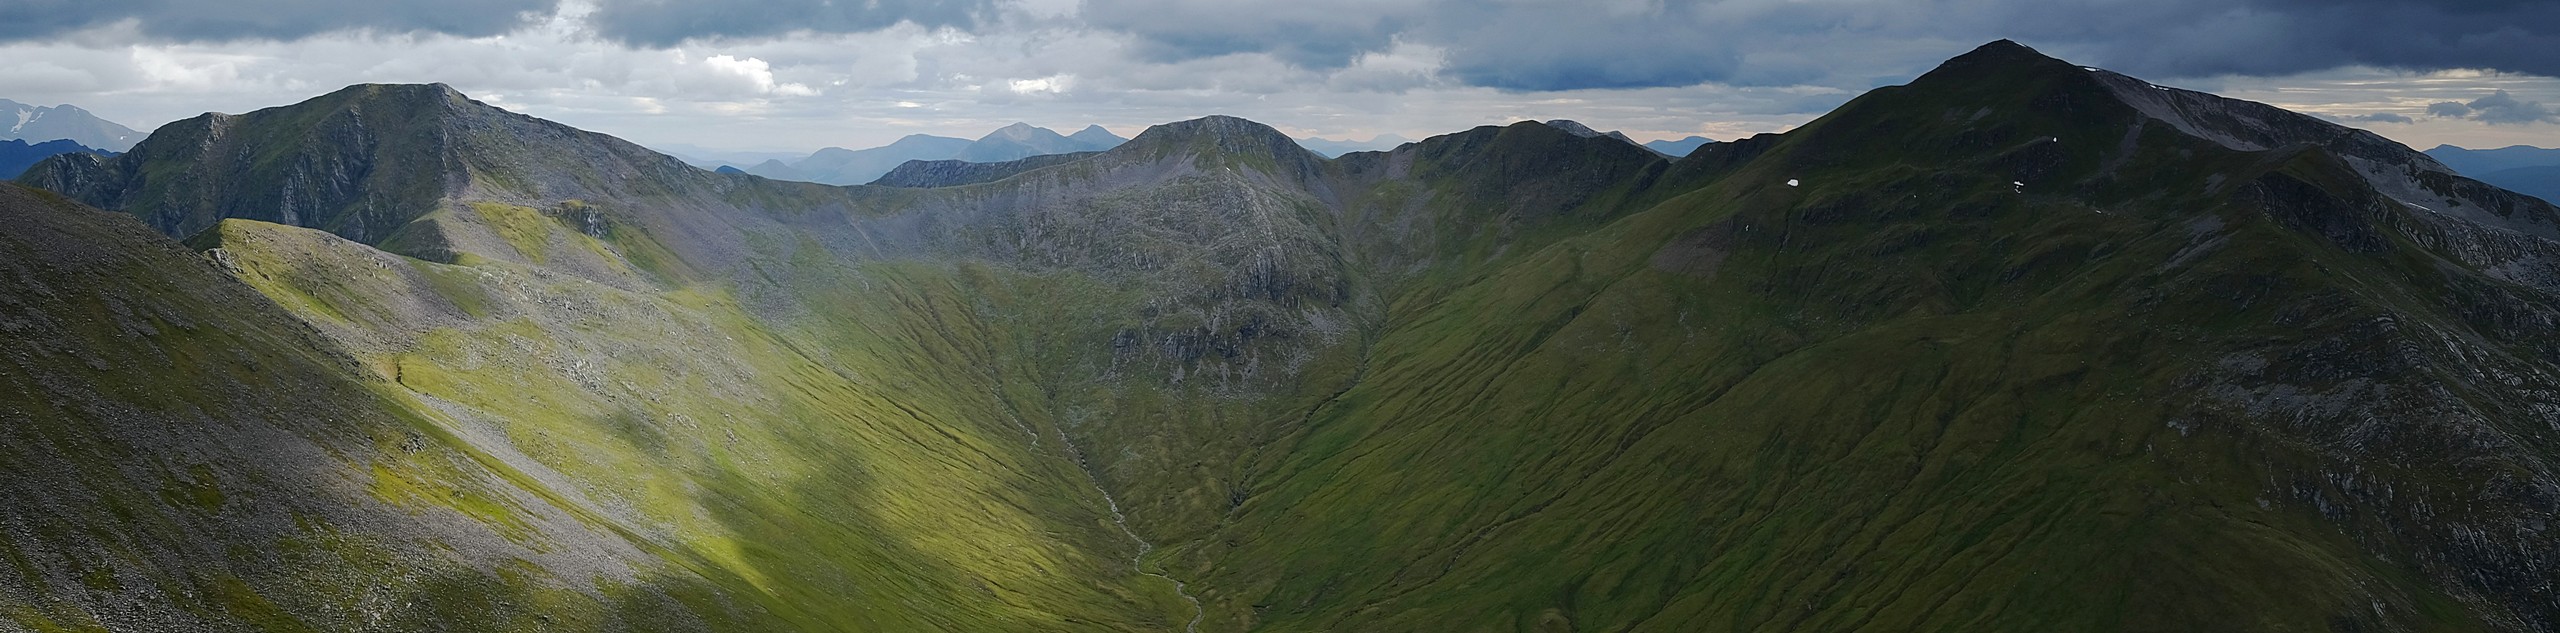
Okay, now onto the good stuff! The Ring of Steall Walk, although challenging, climbs to phenomenal views of layers of peaks fading into the horizon—and you’ll summit four different variations! Not only that, but the walk first immerses you in a stunning, otherworldly valley, where the Steall Falls roar.
From your car, look for the main path leading up the glen into woodland. Not too long after, the glen veers right, unveiling a stunning view of cliffs in the backdrop. Continue walking up the glen and just wait for the scenery to open up—here, you’ll get to revel in a surreal setting of green carved by a river and snow-capped peaks holding the tumbling Steall falls. Pause here and snap a photo before continuing!
After, you’ll go off the path and onto a smaller track leading towards the steel-cable bridge. There are two options here! 1. Be brave and use the two cable handrails to help you balance as you step along the other line of cable holding your feet. 2. Walk through the stream, which can be impassable at times. When you’re across, head left to pass by the Steall Hut and then keep walking into the woods. You’ll walk across the base of Steall Falls, but if the water is super high, you can go along the flats downstream. Follow the buttress base—the ground tends to be boggy here—and then take the stalkers’ path as it climbs uphill. Eventually, you’ll notice the destroyed old path but continue along beside it. Be sure to pause and look back over the scenery.
As you climb, the path starts to improve and travels across the corrie. Continue ascending as you take on a section of switchbacks. Eventually, you’ll go right to reach a grassy ridge. The path will then ascend southeast up the ridge—it gets nice and steep here! Eventually, the ascent chills out and gives you a brief moment to catch your breath before continuing to the first Munro: An Gearanach (3222ft). At the top, take in views of Ben Nevis and more!
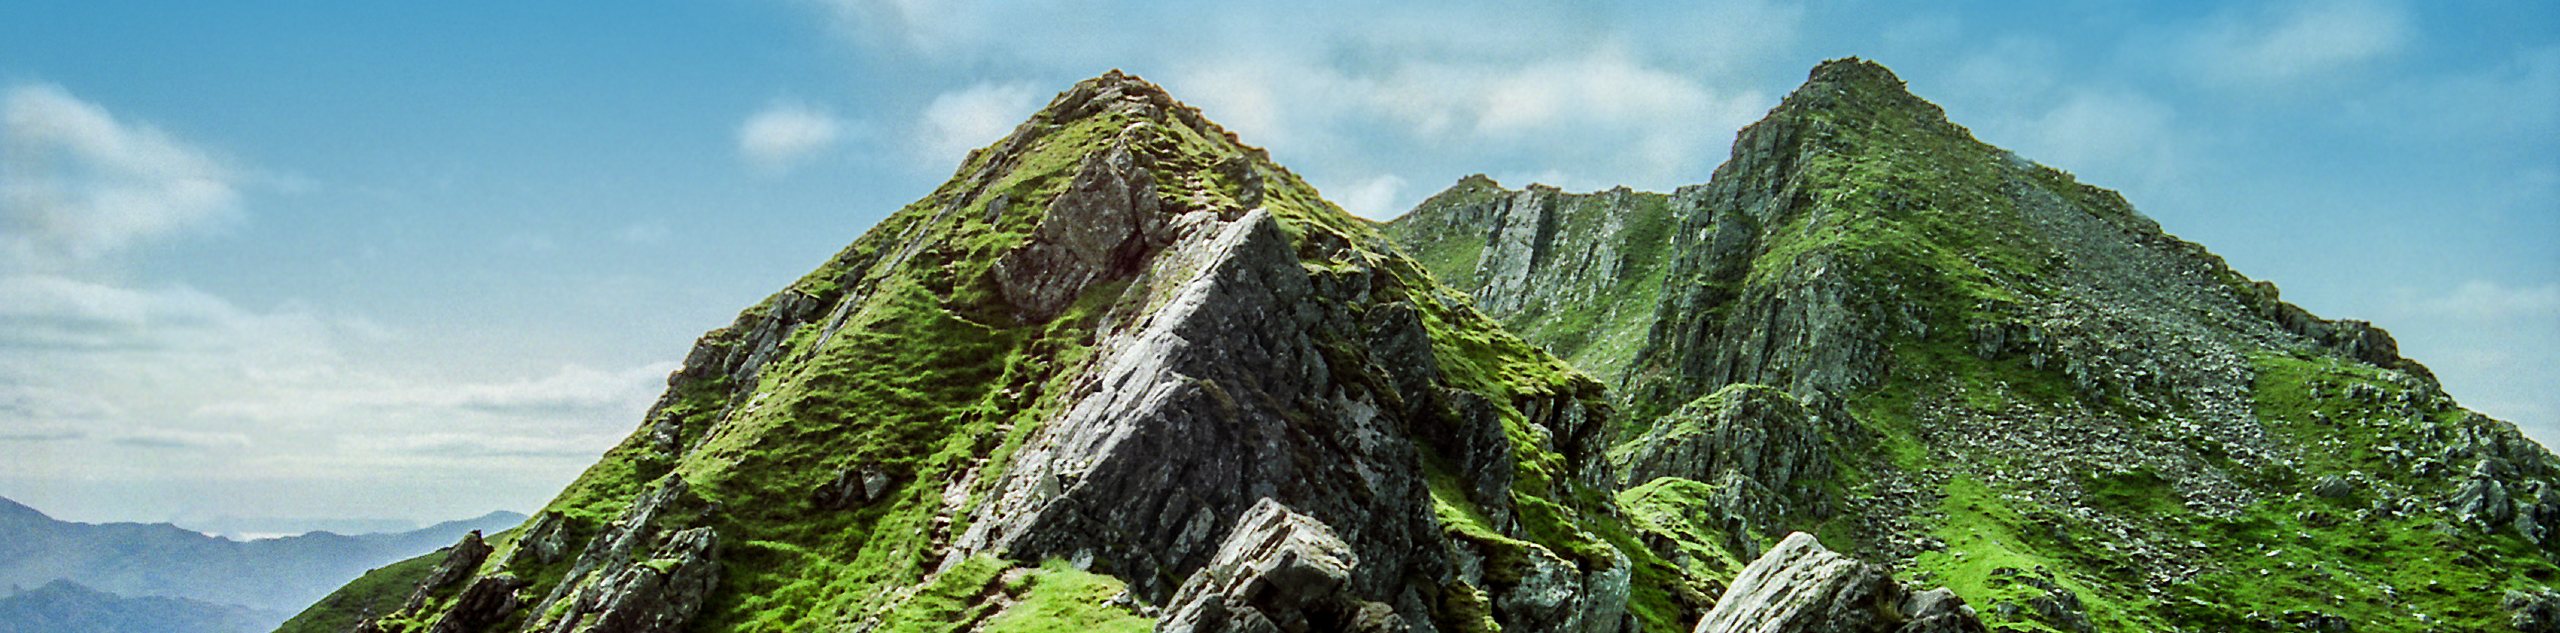
After this, prepare for a more technical section as you navigate the rocky ridgeline of An Garbhanach. Expect to scramble an exposed area. Put on those layers and prepare for wind! And the scrambling doesn’t stop even when the ridge dips to the bealach. From here, start ascending to Stob Coire a’Chàirn (scrambling is on pause momentarily). But, when the ridge intensifies, you’ll have to navigate some scree. When you see the cairn (3219ft), pat yourself on the back because you’ve made it to the second Munro of this remarkable adventure! Revel in views of the Mamores and the Grey Corries.
When you’re finished basking in the scenery, descend the grassy ridge to the southwest before eventually starting the next climb. There aren’t a lot of breaks on this walk, are there? Expect some rocky, loose sections with easy scrambling as you climb. The third Munro of this walk? Am Bodach (1032).
Next, make your way down to a different bealach before climbing to Sgòr an Iubhair, considered a Munro between 1981-1997. After, the route heads north, going away from the Mamores and follows ‘The Devil’s Ridge.’ It takes you to another bealach before travelling atop Stob Coire a’Mhail. Take care along the narrow, exposed ridge. Thankfully, this path is mostly grassy! After leaving the top of Stob Coire a’Mhail, you’ll tackle another technical section along the ridge, or you can skip this adrenaline-inducing part and take the path descending slightly left. However, it still has one challenging part that has you stepping around a boulder. Trust us; this will also get your adrenaline going. Afterwards, the ridge will carry you to Sgùrr a’Mhaim, the fourth Munro of the Ring of Steall Walk!
Catch your breath as you look back on Devil’s Ridge and check out Stob Ban before continuing onward. That’s right. This loop never seems to stop, does it? Whatever you do, do NOT take on the northeast ridge to Steall. There’s a super dangerous steep section lower down, and several people have suffered fatalities here. Go right along the northwest ridge instead. To avoid a possible mishap, download a GPS beforehand! Eventually, you’ll arrive at a track above Allt Coire a Mhusgain.
This path descends to a different car park. From the car park, go right to cross a bridge and then you’ll have to follow the road for 1.6mi to reach your car! Beware that Paddy’s Bridge (located at NN158684) is closed due to unsafe conditions, so don’t bother returning via the river’s southside.
Frequently Asked Questions
Can I bring my dog on the Ring of Steall Walk?
We recommend leaving your dog at home as the Ring of Steall Walk boasts some tricky-to-navigate and technical sections that involve narrow, scrambly ridges.
How hard is the Ring of Steall Walk?
This walk is extremely difficult! Therefore, we recommend that only serious walkers who’ve tackled Munros before taking on this route.
Insider Hints
Just a reminder that after the 4th Munro, do not take the northeast ridge to Steall—down below can become very dangerous. Bring a GPS to ensure you stay on track.
Try to avoid bringing your dogs on this walk!
Bring layers as you’ll encounter several exposed sections throughout the Ring of Steall Walk.
Pack a lot of snacks and water to keep you hydrated and energized!
Similar hikes to the Ring of Steall Walk hike
The Saddle, Forcan Ridge and Sgùrr na Sgìne Walk
The Saddle, Forcan Ridge and Sgùrr na Sgìne Walk is a rugged adventure that boasts a thrilling challenge while unveiling…
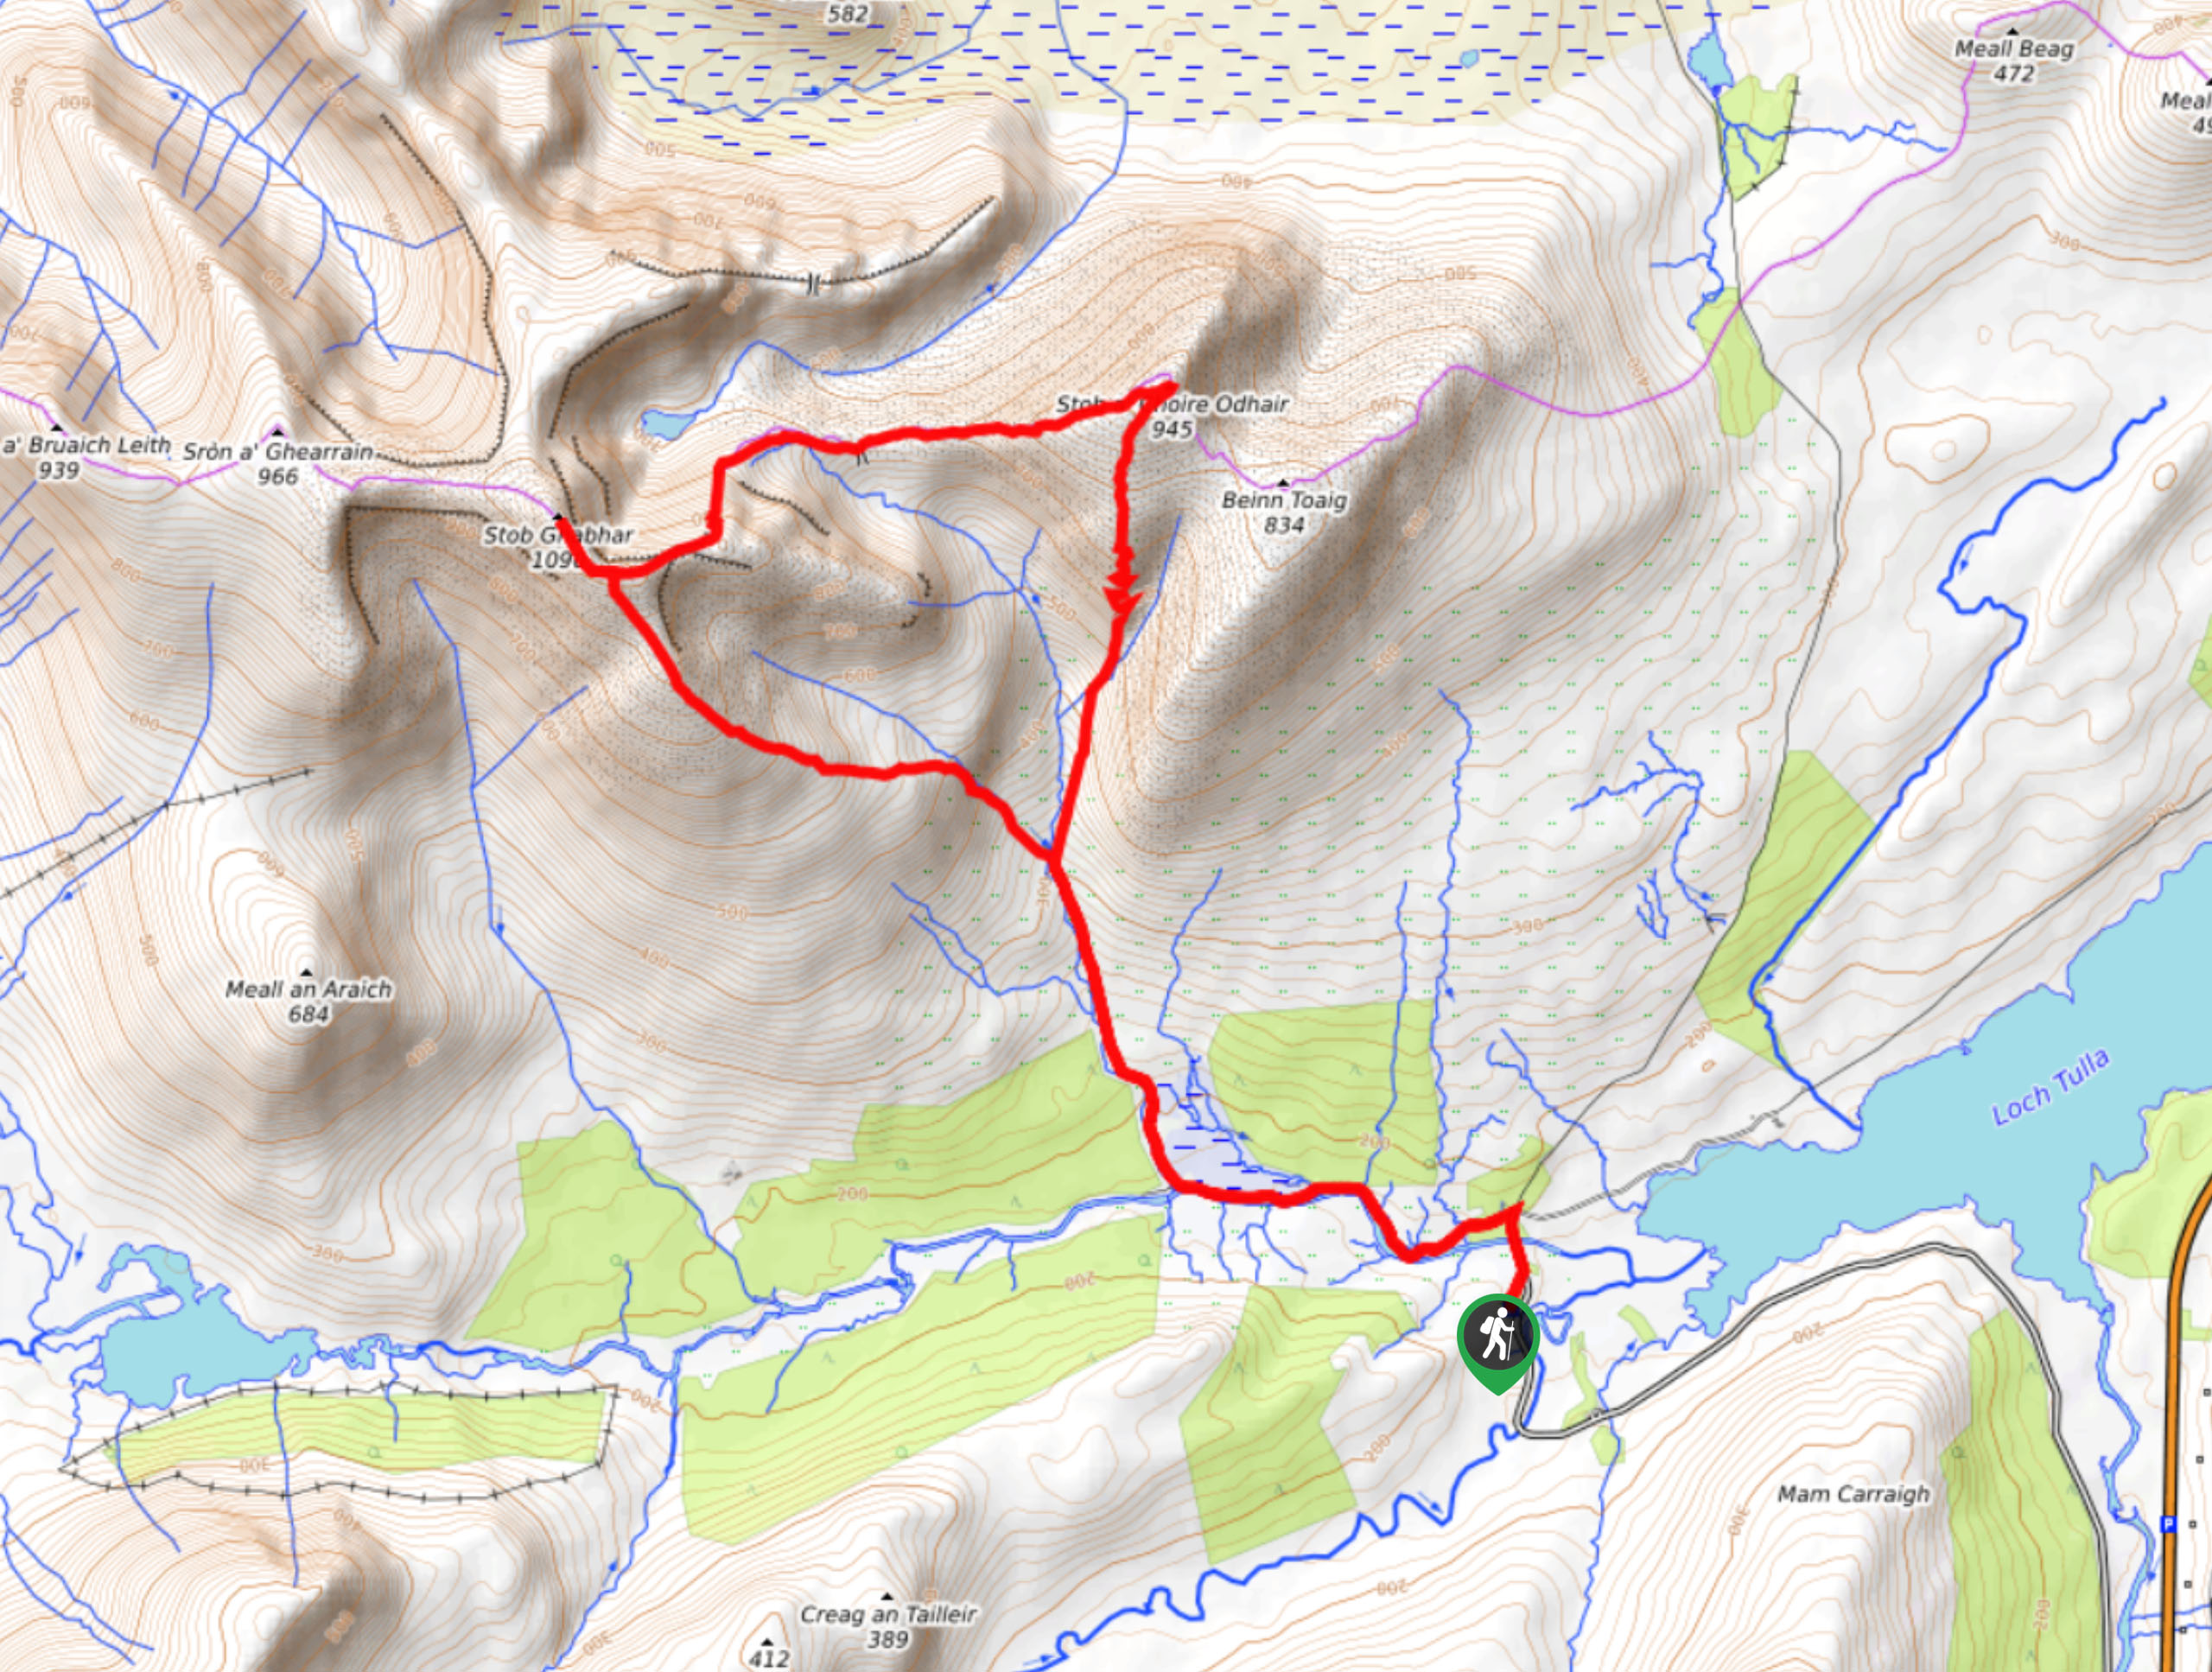
Stob Ghabhar and Stob a'Choire Odhair Walk
Confident and experienced hillwalkers should only attempt the Stob Ghabhar and Stob a'Choire Odhair Walk due to the elevation gain,…

Cul Mor Walk
The Cul Mor Walk has you climbing a mostly easy-to-follow path leading up a Corbett, a mountain just not big…
Comments